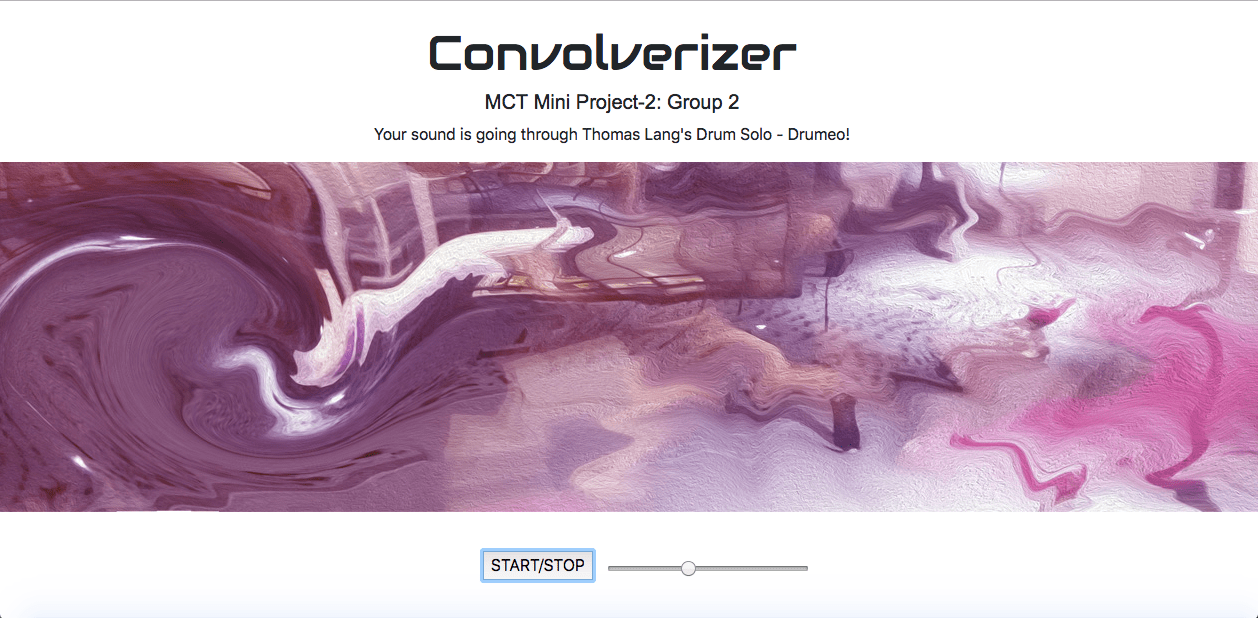
Convolverizer
Introduction
Real-time processing of ambient sound, voice or live instruments. We are several string instrument players and sound artists, but would like to prototype something modular that extends our artistic expressions, which is always at hand and instantly available. Create hidden gems that don’t require additional expensive equipment. Get your laptop, convolve it, GO!
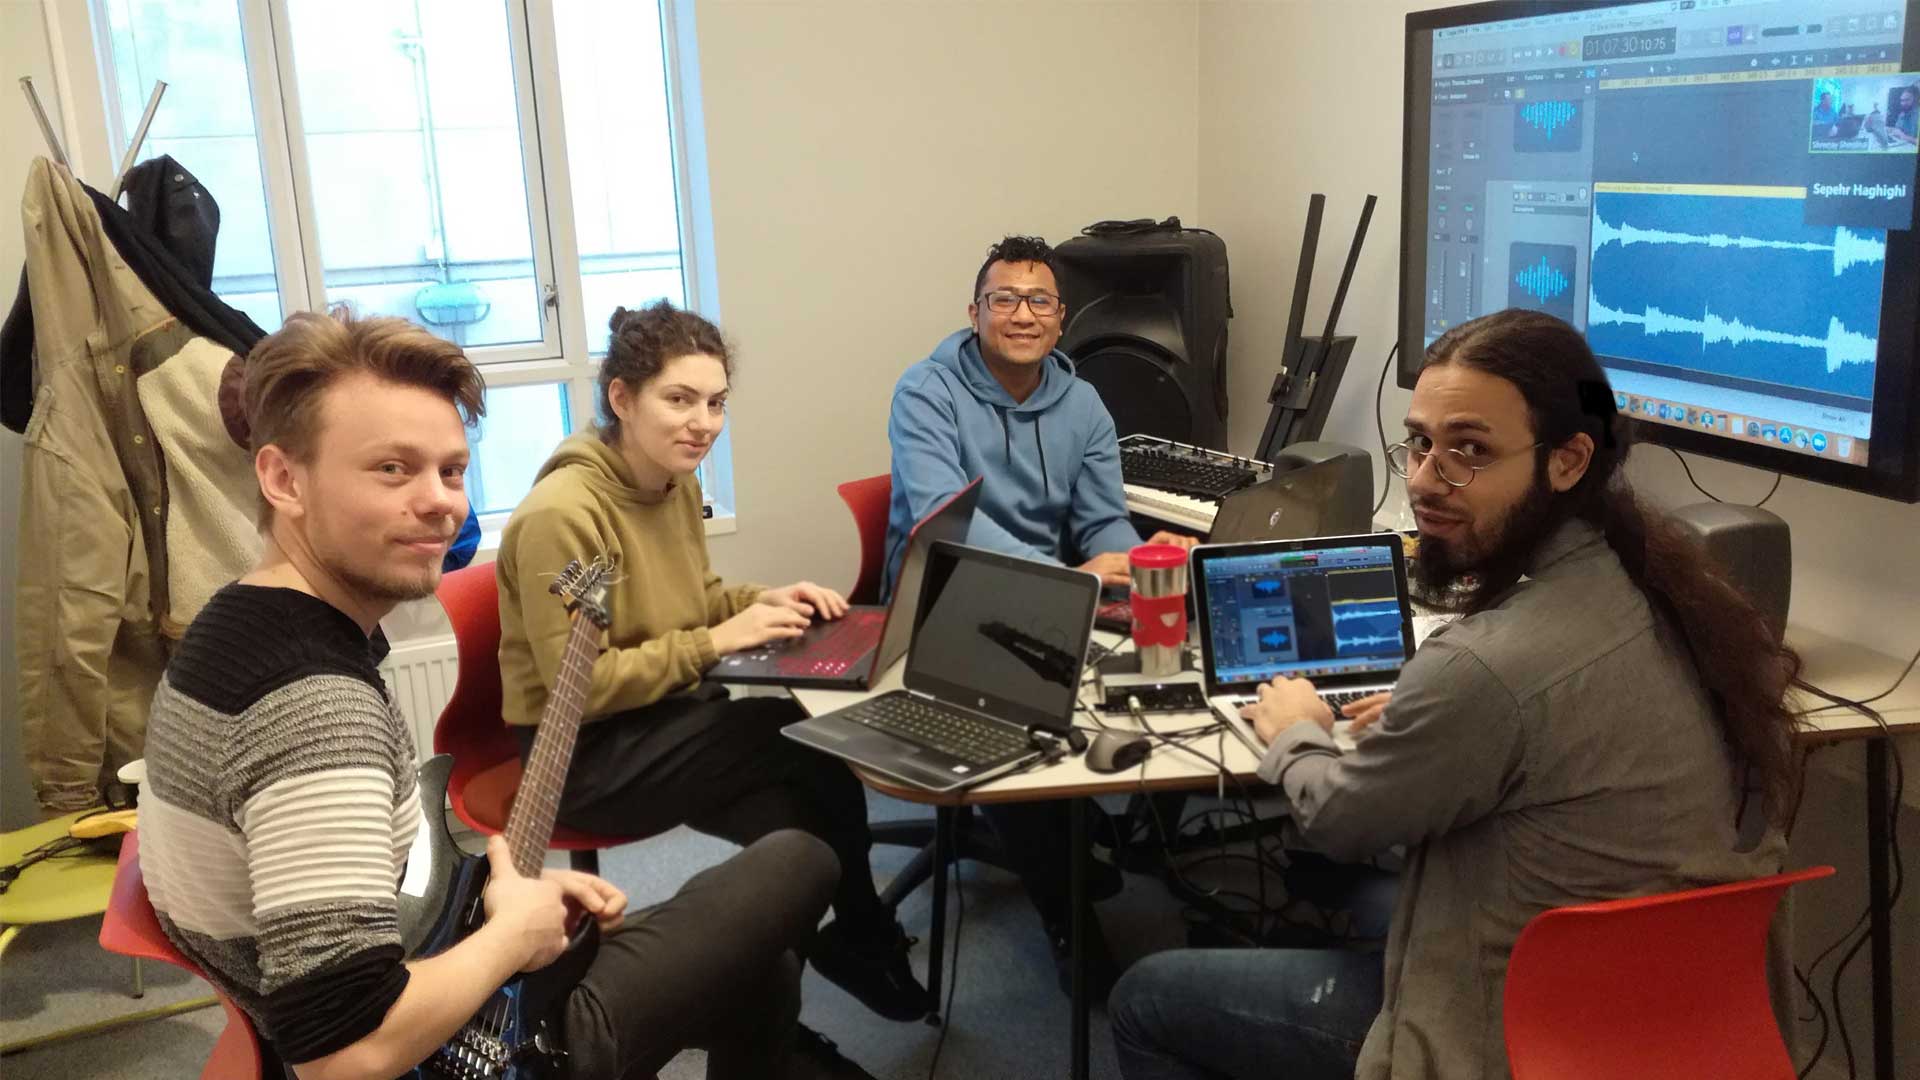
Development team, why are we doing this:
- Eirik: wants to do/learn something new
- Sepehr: likes to extend his guitar and other sonical productions
- Karolina: has little space in her room and therefore wants a fancy mobile application
- Shreejay: loves live visualization
Technologies used
Working tools
Performance
- Sound card / audio interface
- Guitar
- Shure SM57 Microphone
- Prototype of our Code
Research and development journal
DAY 1
On the first day, all groups have formed up, different from other groups our final product was not 100 percent defined. We had a working idea, developed a concept and agreed on an application model:
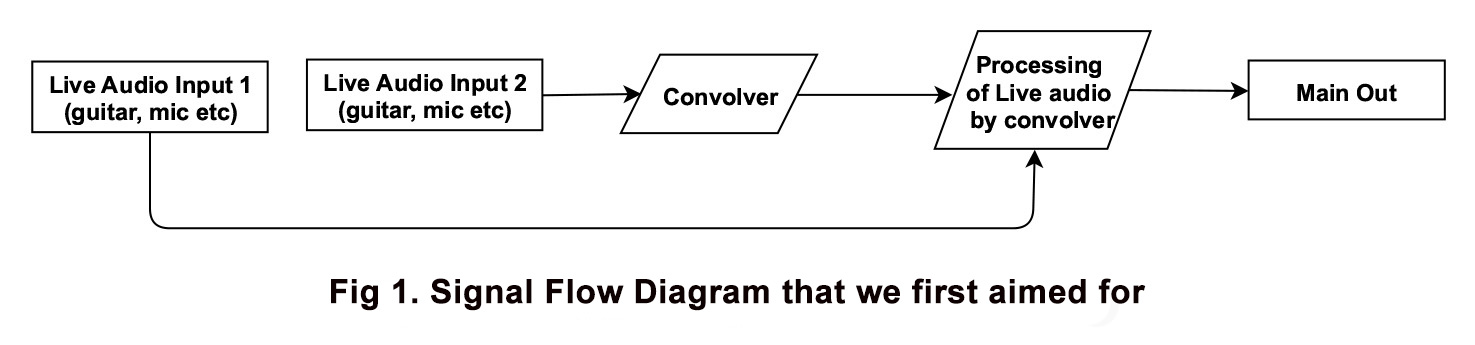
- Two independent audio sources that influence each other in real-time
- Mobile application to extend the prototype in another environment
- Having a modular application that is accessible which does not require a bulk of technological hardware and software
Since the level of programming expertise was more or less equally low distributed throughout the group, we left the division of the roles open. Sepehr suggested right after we formed as a group to work with the p5.js library, and showed some examples. Shreejay again suggested going for web audio API. Karolina and Eirik assisted in research for both ways. We agreed to try building the model with the Web Audio API library first.
DAY 2
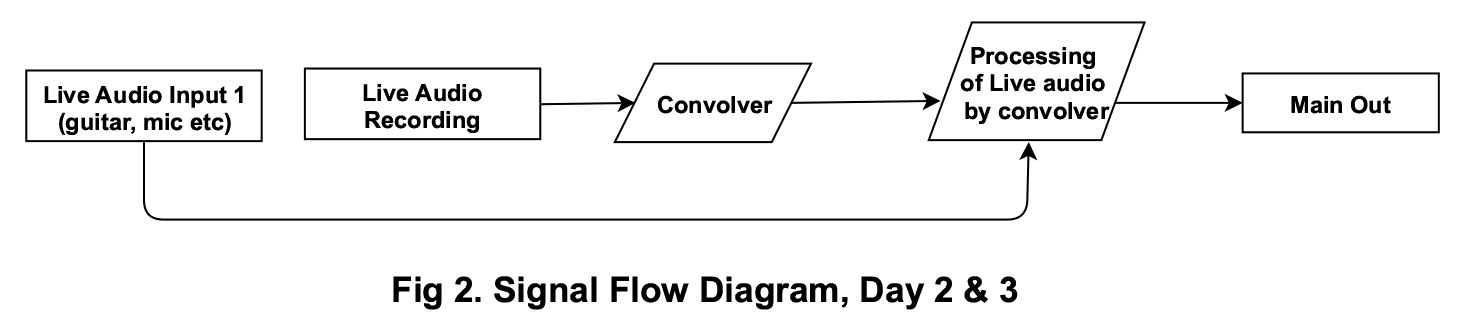
During our research, we realized that we would have to trim our concept a little bit more and take it step by step. We were struggling to get two audio inputs as two separate channels using Web Audio API. After that, we thought about recording one input and obtain the convolution reverb from the recorded piece. Finally, the idea was to mix the resulting output with another live audio input and send it to the main output. We spent a lot of time to find the right code snippets to make the convolver listen to the microphone. Soon after we found a code that gets the media stream, enabling audio and video. We then manipulated the code so as not to include video.
In the first feedback round, Anna recommended us to build a more modular system for situations where the live input cannot be activated, and would then activate a pre-recorded audio sample.
DAY 3
We took the advice to heart and divided the workload into sub-tasks:
- Getting the sound from the mic and having the sound file as the convolver input
- Getting the sound from the mic recorded and save it → being implemented on the real-time mic
- Load the sound file and implement it on another sound file (as an effect)
- Creating visuals with p5.js or CSS
We were a bit overwhelmed by the complexity of our initial idea and the backup solution we wanted to implement proved to be a project in itself. Shreejay suggested going for something else instead, to simplify things and would make it suitable for our level of expertise. In the end, we all agreed to continue our project but within the p5.js library, step by step. We were reassured it would make things easier since many examples were given and we would only have to find out how to connect them in the code. We considered at some point to work without the mic and only load two sounds that could be used as an effect on one another. We agreed on two scenarios for the application, each divided into different sub-steps. Sepehr and Eirik worked on fusing the impulse response to the live input and Karolina and Shreejay worked on integrating the recording function.
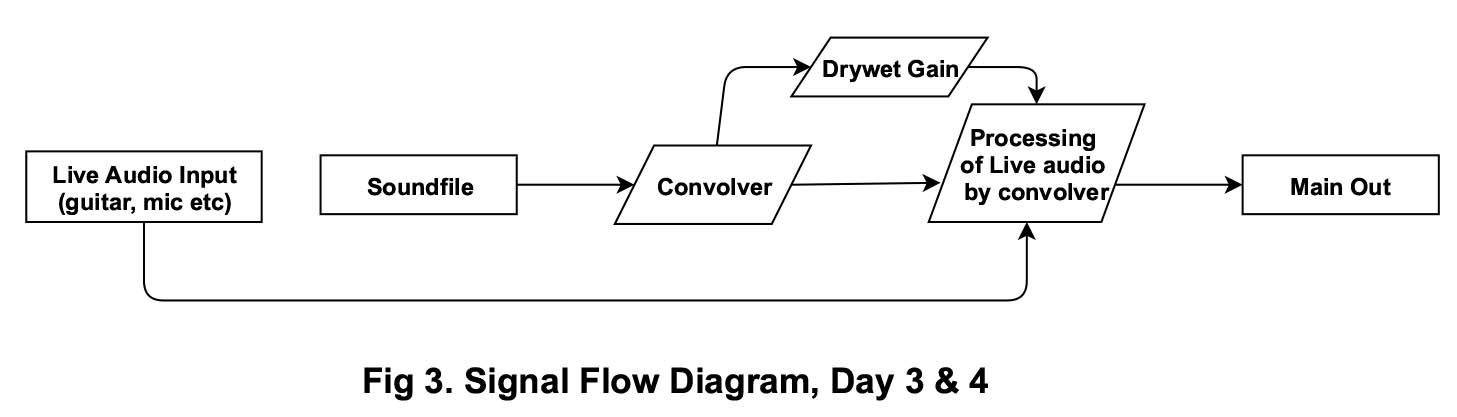
DAY 4 After we had some guided cleaning of the code and more guided coding sessions, we were able to finish the prototype and make it work both visually and sonically. In the process, we replaced the idea of using live recorded sound with a preloaded soundfile. Fig 3 shows the final audio signal flow diagram of the prototype. We were able to perform together with almost all developers and everything went well, fortunately. You can read about our performance below.
Performance
The performance was set-up in Trondheim. We used a guitar and a microphone for the live input. As far for the guitar, the notes played began with low notes and gradually changed to high notes. In our experience, high pitches can lead to a better result for this convolution effect. In the convolution process, the low notes are overemphasized and produce a muddy sound profile. Therefore the sounds produced by the microphone were lost in the mix and could not be convoluted properly.
Also, sustained notes should let the effect be more prominent, since the sound coming out of the convolution process goes on in a loop. Using sustained notes could lead to more control over the generated sound. Although, if anyone is interested in a chaotic atmosphere, there would be no limits to the playing style. Also, that could potentially involve any other sound sources as well, not only instruments.
Since the sound that we used for convolution was an intense Drums solo, the dynamics of the effect were pretty intense as well. This has led us to a clearer and more visible convolution effect. Therefore, in any case, if you intend to have an intense and very dynamic convolution effect on the input sound; try to use a more vivid and high dynamic source for the convolution as well.
However, we missed the opportunity to make our performance (including positioning us within more camera resources, a clear announcement of the start of the event) more demonstrative for lack of time, which ultimately affected our performativity. In the feedback round the audience reported a glitch in sound during the performance, we suspect that in connection with the process of buffering and dry gain. In addition, the connected (old) computer was no longer in good condition during the performance after a few hours of coding. When we performed again for the live demo, which you can see below, the glitch was almost not audible anymore.
Working Style
Research, design and programming were carried out in collaboration so that the prototype developed in a constant discussion and joint evaluation of the application. We established a main hub in one of the group rooms and put the code from Visual Studio Code on the screen. From there, we brainstormed and prototyped together. The strategy we used has the advantage of being a very open and collaborative working style. With our group dynamics in terms of previous knowledge, we could risk that one person did most of the work and the others did less. With a shared screen and open dialogue, we prevented that.
Decoding Convolvorizer
The code of Convolverizer has mainly two parts. First, the toggle button operation and slider function, which provides the user to control the application. Second, the role of canvas and creation of live visualization. We have tried to comment on each line of the code so that you could easily figure out what is what. You can check the full code with relevant files and libraries in the github repo.
// Part I - Eventlistener for click on Canvas
    function togglebutton() {
      if (playing == 0) {
        // start getting live audio input
        mic = new p5.AudioIn(); // this function is setting mic as mic input
        mic.start(); // mic input can now play sounds
        cVerb = createConvolver("recorded/drumsolo.mp3"); // This function takes the Impulse Response
        // from the soundfile and uses it to recreate sound of that space. The sound is convolved
        // with different impulse response every time the start/stop button is pressed.

        mic.connect(cVerb);
        mic.disconnect();
        cVerb.process(mic);
        playing = 1; // stating that its now playing

        // Following 3 lines are for visualization
        // Fast Fourier Transform (fft) function analyses individual audio frequency in a waveform
        fft = new p5.FFT(0.9, 1024); // 0.9 refers to smoothing & 1024 refers to bin array length.
        w = width / 350; // w = width of each rectangle in the visualization
        fft.setInput(cVerb.process(mic)); // cVerb.process(mic) is being used for visualization

      }
      else if (playing == 1) {
        // stop playing sounds
        mic.stop();
        cVerb.disconnect();
        playing = 0;
        start = 1;
      }
    } i
// Part II - Drawing Canvas & Creating Visualization
function draw() {

    if (playing == 0 && start == 1) {
    //show the image when stop button is pressed
    drawimage(); // it is a function defined in other part of the code which simply shows the image on canvas

    } else if (playing == 1) {
    //stop showing the image and start the visualization
    createCanvas(1275, 350); // created fo the panasonic monitor in the group room at Trondheim campus
    background(255); // white background

    var val = slider.value();
    valnorm = val / 100; // defining intensity of the slider
    cVerb.drywet(valnorm); // setting the slider as the drywet gain controller

    noStroke(); // setting lines of each rectangles as normal
    var spectrum = fft.analyze(); // define spectrum as array of amplitude values across the frequency spectrum
    //console.log(spectrum.length);

    for (var i = 0; i < spectrum.length; i++) { // loops for i = 1 to spectrum length
      var amp = spectrum[i]; // gets amplitude of each spectrum
      var y = map(amp, 0, 255, height, 0);// defining value of y-coordinate as amplitudes
      rect(i * w  , y, w - 2, height); // rect(x-coordinate, y-coordinate, width, height)
      fill(255, i, 180); // filling each rectangle with color

      // x-axis refers frequency from low in the left to high to the right
      //y - axis refers to the aplitude
    }
      }
 }
Design and interactivity
When it comes to design and interaction, the most important thing is that the user interface is easy to use and understand. Therefore one button for starting and stopping the process would do the job. Also, we have the visualization in the middle of the page to have the visual balance maintained. To regulate the level of the convolution effect, we’ve added a slider next to the Start/Stop button to give the user more control over the effect.
Challenges
Group challenges: Our group was put together of people who did not have any previous knowledge in programming prior to joining the MCT program. This proved to be a very big challenge since we had to research the very basics of the programming syntax for us to be able to progress. Programmers talk about “Languages” when referring to the syntax that is used when writing computer programs. We had to Talk when we, in all honesty, struggled to stutter.
Conceptualizing and deciding on the final product: Our plan was always to use the Convolver, but how to actually achieve it was much discussed within our group. We first wanted to run a live audio signal into the convolver (e.g. voice), and make that affect another audio signal (e.g. guitar). We found out that it was hard, and for this prototype, we decided to use a recording of a Drum solo as the audio input that the convolver would be fed with.
Familiarizing ourselves with Libraries and code: We decided to use p5.js as an additional library. That involved working with a new environment. This was a bit challenging, but luckily there are a lot of videos and tutorials online that are tied to the p5.js community.
Achievements
All in all, the most significant achievement of ours is the gained exposure and understanding of coding in music. We were hitting a near vertical learning curve these two weeks, and to end up with a working prototype after this course is very pleasing. There was a bit of frustration tied with the difficulty of the task we had at hand, but through that, we managed to have a good working relationship and good teamwork. We also achieved a greater understanding of the use and implications of technologies used in coding, and also with the p5.js Library.
Lesson Learned: While aiming to get two live audio input from two separate channels, we noticed that both p5.js and Web Audio API do not have functions in order to support two parallel inputs or more. For example, by using the MediaStreamAudioSourceNode & getUserMedia functions, it is only possible to get one audio and one video input channels. Similarly, by using the p5.js AudioIn & mic.start() functions, it is only possible to get one audio input channel.
Future development / What is next
The next step would be developing the whole project for different platforms. It is a Web Audio API project, browser-based and we can use it the way it is in a smartphone right now. But with further development, which is going to be mentioned further on, it would be more challenging to present it on smartphones as well. Also, since none of us in the group is a professional developer, we didn’t manage to reach our ideal result. As it was mentioned, below are the future steps and prototypes that we may want to achieve later:
Developing the project so that the user can choose between several different sounds, so the project can use the selected sound to create a convolution effect.
Developing the project in a way that it would record the surrounding or any sound source that the user intends to record; save it and use it as the source for convolution process for the live input.
Regarding the first option, it is not going to be a challenging matter. But when it comes to the second option, since the project should be able to save the recorded sound in a server and then download it and use it as the convolution source, the whole process gets more complicated. In other words, we have to develop the server side code in order to achieve this goal; and that requires more practice and experience in developing.
In terms of interactivity, we overall we tried to create a simple, user-friendly interface, in order to create a more pleasurable experience for the user. The next step is to make it adaptable for various devices and screen sizes.
Acknowledgement
Our heartfelt gratitude to Anna Xambo for guiding us all through the process from Day 1 to Day 4. Thank you so much for your support and patience which helped us learn and practice coding in Web Audio API, Html, javascript, CSS and p5.js. Similarly, thanks to all our peers and audience for their constructive feedbacks and suggestions. Also, we would like to take this opportunity to thank Hamed Kazemi wholeheartedly for heping us to solve and own his code for our complex plan shown in Fig.2 above. His creative code could record live audio input in cache memory and rout it as an input to the convolution process using Node.js. Following live demo shows the collaborative work with Hamed:
And last but not the least, a big thanks to shiffman from
The Coding Train
for sharing his huge collection of tutorials on YouTube. The
Sound Visualization tutorial in particular, gave us insights in creating a similar kind of visualization for this project.