DSP Workshop Group C
During our DSP workshop we were introduced to several tools and techniques for creating, manipulating and controlling sound. We started exploring Csound and waveguides. We learned a bit about the code in Csound, setting inputs and outputs and rendering the result to audio files. We started working on a string sound and were able to apply effects like saturation and reverb. Using the Csound score and p-fields we experimented with writing a composition using frequencies and Midi notes. We learned how to layer and combine several waveguide instruments and created a short composition. Later in the week we got familiar with building VST instruments and effects by using Cabbage, and were able to compile our creations into an application that can be used in any DAW. By using several external input sources like the contact mic or a midi controller we were ready to embark on our main task for the week, creating a short performance using our new instruments, to be performed in the portal simultaneously between Oslo and Trondheim. Each location worked and developed a different kind of instrument.

The instrument in Trondheim makes use of waveguides simulating the sound of a string using the input signal from the contact microphones as a source signal for the attack. The signal path within the instrument can be described as follows:
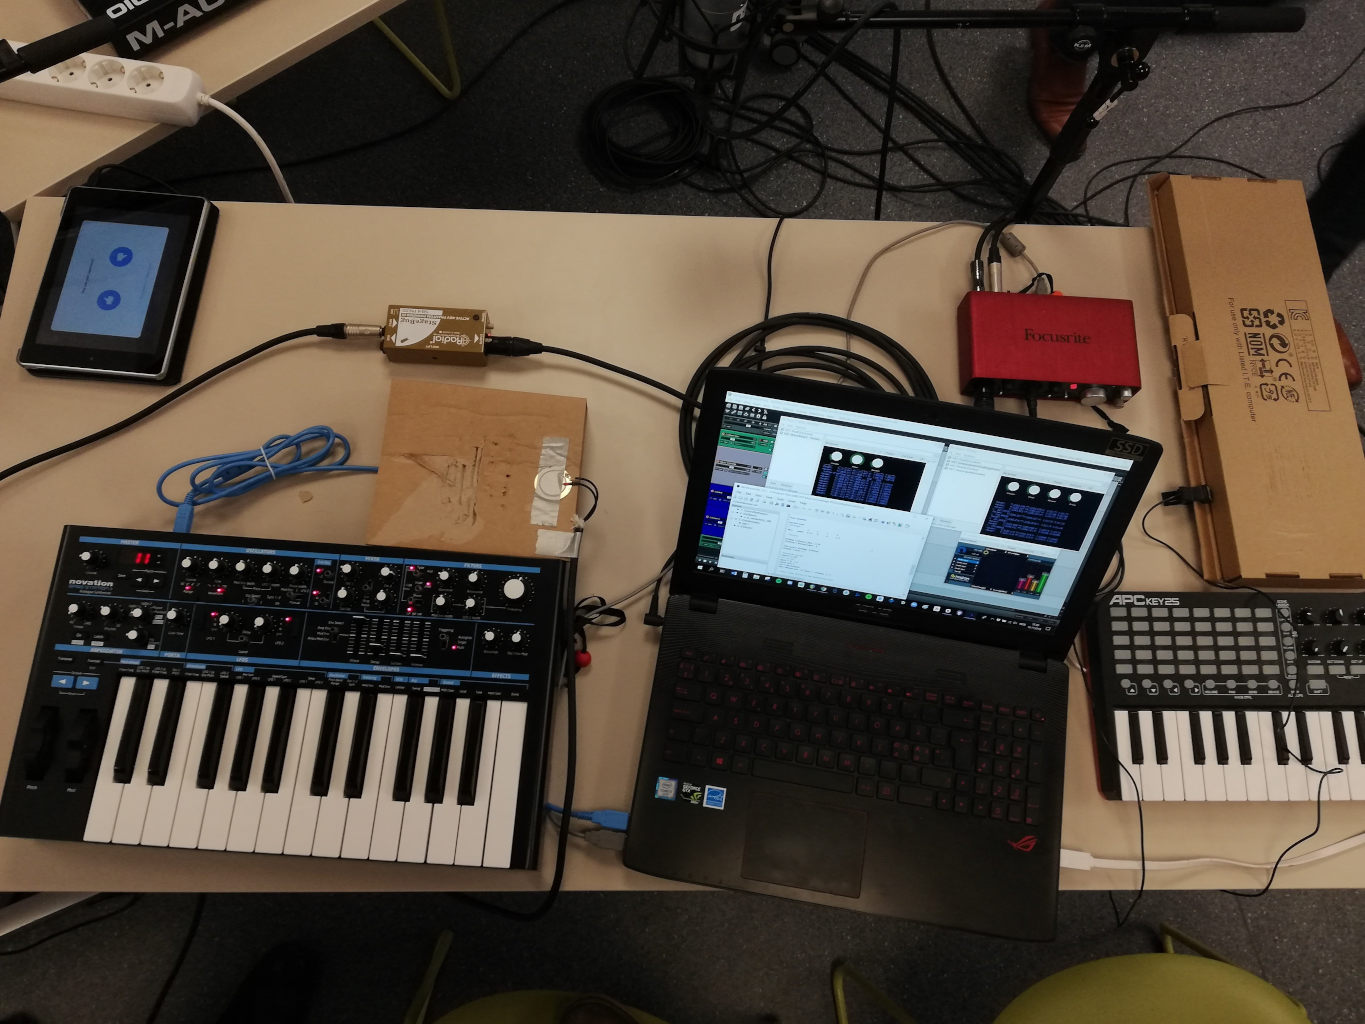
Sound source -Contact microphones on pieces of cardboard going into an external sound card.
CSound code -Pitch modulation (MIDI key mapping to adjust the pitch of the string waveguide by setting the corresponding delay time frequency as well as vibrato control.)Lowpass filter (helps taming the sound dynamically and also has an interesting side effect of pitching down the sound slightly when hard filtering due to the increase in delay time in the feedback loop). -Saturation (Can be used as a tool to make the sound more aggressive while still being pleasant due to the soft clipping. A mix control that fades between wet and dry signal is used to maintain the same level of output at all times.) -Reverb (effective way to shape the size of the sound. The same type of effect level control as in the saturation is used here as well.) Cabbage -A middleware between CSound and DAWs used to create VST plugins. -Even though one of its features is to design a GUI, I chose to keep it minimalistic with black and white interface with a debugging screen in order to have total control of what’s going on. Cabbage can be a bit unstable, so this feature helped a lot during troubleshooting. DAW -Reaper was chosen for this purpose at it is very cooperative with the Cabbage plugins as well as being the digital audio workstation of choice for one of the group members. -Here the contact microphone signals runs to their own dedicated tracks before routing them further to two tracks with separate MIDI controller inputs. -The result of the processing within the plugins as well as the Hadron particle synthesizer was then sent back out of the external soundcard in stereo to the mixer to Oslo for them to hear and process it further.
Personal impressions regarding the performance
Eirik (Trondheim): The performance of the piece was an interesting occasion. We had done some trials before the concert and what had emerged was the dichotomous nature of our setup. When using contact mics in the way we were, one gets a percussive input. Sustained notes are harder to produce than purely percussive, but can be produced by scratching or stroking the cardboard. On the other side, the MIDI controller we used has no real percussive function, but only serves to control the parameters of the contact mics signal. This leaves something to be desired when initially playing the MIDI keyboard. Nevertheless, this gets solved when one changes the way one thinks about playing the keyboard. Rather than looking at i as a trigger, it is helpful to look at it as a preset to the contact mic. First you define the chord by the MIDI controller, before rhythmically defining it through the contact mic.
These parameters make the instrument very fun to play together. If one person lays down a chord on the MIDI controller, the other person has to decide how to rhythmically work with it. The person on the MIDI side can in turn change how to play to try to initiate a rhythmical response form the other person. One could together decide to create a type of micro “call and response” sequence that could be a very interesting musical performance piece.
Karolina (Trondheim)- We created small bits and sound pieces during the workshop which helped to get familiar with the Csound syntax. The intuitive-experimental approach eventually became a growing expertise and evolved into a more complex procedure. Improvising together across cities is possible, but finding a way to include all participants playing on one instrument interface remains challenging (it was initially planned to include signal flow manipulation across the Portal). Time as the main limitation factor, however acted as an creative force.
Jonas (Trondheim)- A balance between the physical (Cardboard, contact microphones, MIDI-controllers) and the digital plugins made in CSound through Cabbage used in real time within the DAW Reaper. The visual component also helped illustrating what was going on to the audience as they would see the connection between the interactions with the cardboard and the sound. A unique processing plugin made by Øyvind Brantsegg called Hadron was also used. His plugin can load four different processing effects that can be mapped to each corner of a XY pad. That way we could map two knobs to fade in between these effects as I wished throughout the performance. The effects I used within that plugin were of the likes of grain delay, flanger, tremolo and so forth. A limiting factor of the instrument was the nature of the cardboard and keyboard having to be played simultaneously in order create sound. This resulted in the necessity of at least two performers sharing the workload, but also gives the potential to have greater control of more parameters.
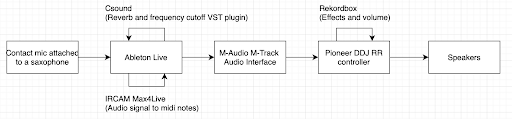
Guy (Oslo)- I used the saxophone together with a contact mic. From past experience performing at the portal I have learned that the contact mic will prevent any kind of feedback. In Ableton, I used an IRCAM Max4Live device that converts audio signal to midi notes. Those midi notes were send to another channel which contained an electrical piano instrument with an arpeggiator. At the end of my channel strip I have used the reverb and frequency cutoff VST plugin I have compiled with Cabbage. With mapping knobs on my midi controller I was able to control several parameters like reverb size and cutoff, arpeggiator on/off and saturation.
Elias (Oslo)- My plan was initially to use my Pioneer DDJ RR (DJ) controller to get input signal from both Guy in Oslo and from Trondheim. The plan was to further add on effects (like reverb) to these inputs and to control the output between those input signals. After hours of testing and trying to figure out how the DJ controller would work with Ableton or other sound softwares, I had to go for a backup solution. I ended up using the DJ controller to only control Guys signal, and used built in effects in Rekordbox (like echo), instead of the VST plugins from Csound.