A-team - DSP workshop blog

DSP/Csound/Instrument Design/Network performance
During the week we worked with :
- Digital Signal Processing (DSP)
- Instrument Design
- Sound Synthesis
- Generally Failing at Code (and trying again!)
On the final DSP class we were bringing it all together - and performing our combined CSound based creations! Having the day to develop on our instruments, we prepared for performing with the other groups at 2 o’clock. After finding our respective rooms, We had a A-Team meeting on how to finish off our sounds,and devise a plan of action for our performance.

Sam - Synth Bass & Drums
Espen Wik - Strings & Pads
Sepehr - Percussion & Synth FX
Jørgen - Stringception with tafsofon and MIDI keys
The Practice Sessions
By looking at the instruments we have collectively had as a group, it seemed like a good plan to go with a mainly ambient piece. With most of the sounds stemming from sound made by physical modelling, the instruments were mostly tonal. This made it simpler to keep in rhythm and instead focus on fitting our sounds into a textural composition that is spread over the frequency spectrum; making it pleasurable to our ears, possibly.
The last element we included was a synthesised drum beat. This was to add some pace and excitement to the arrangement. We planned for the beat to come in at 2 minutes into the performance, it would rise in tempo as the jam comes towards the end. On this buildup, we pushed our instruments, increasing tension for the finale. So the composition was planned as first half ambient, second half with the beat and a build up in tempo for the finish.
Soundcheck and setup was a little chaotic, with all three teams due to play back to back, with a whole host of technologies to keep track of. Even so, we managed to get everything set up in the end, and adjust what levels we needed. During the performance our recording clipped in some parts - the sound from Oslo was pushed a little heavy. This could have been from the mixer, or with the levels going through Lola. It is definitely something we would have liked to have avoided - but teaches us to be more careful with levels using Lola next time.
Well without further ado - our recording!
Technical and creative aspects
Below you can see the signal chain of our group. Please make the embedded flowchart fullscreen, and press each group member’s computer for their own DSP.
The Oslo Team
Sam
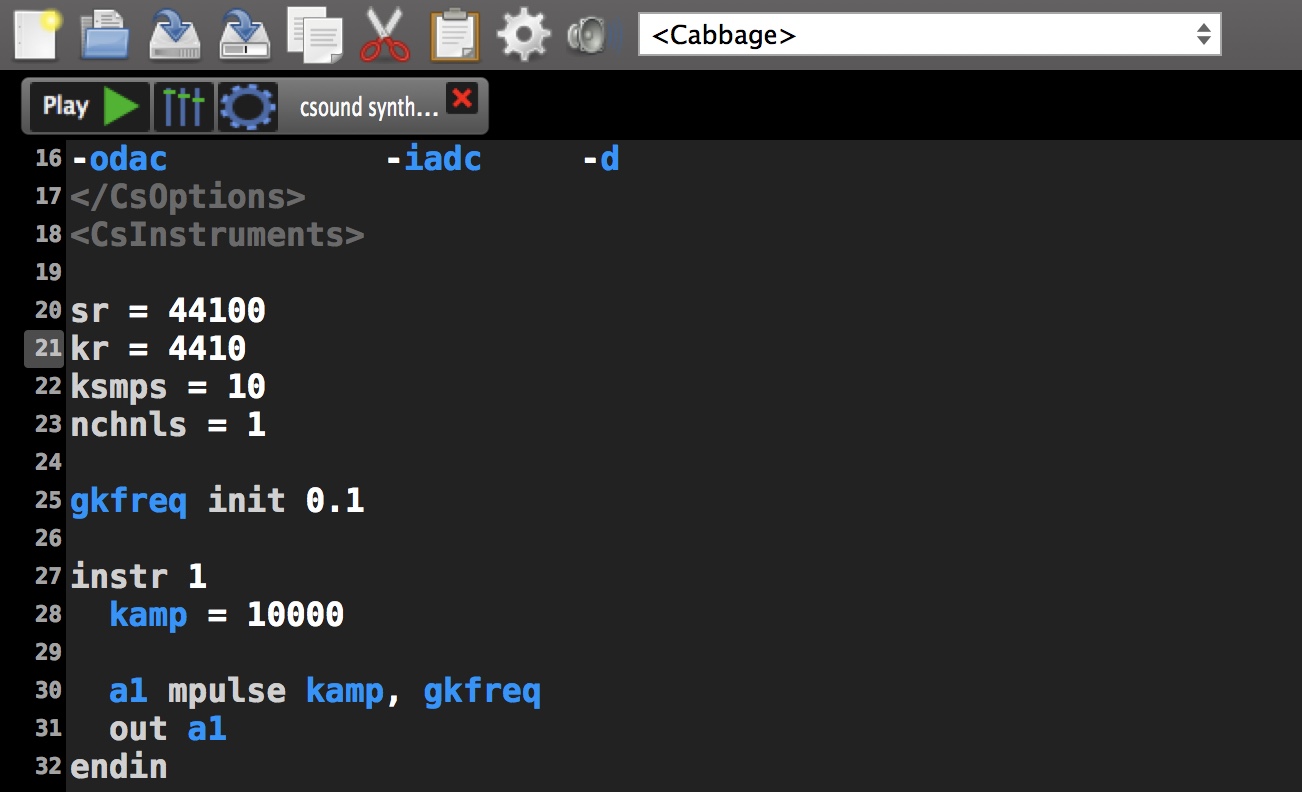
Sam had created a wave based instrument in CSound, and went on to further process and mangle in Ableton live. The idea behind the instruments creation was to make a full sounding reese sound, by phasing two oscillators together. During the workshop Sam had created a instrument patch in CSound using the vco2 opcode, with inspiration from a tutorial on the cabbage website. The vco2 was used to produce a saw wave, with iamp opcode determining the amplitude of the signal, and to output the signal as audio. The code was then imported to cabbage, adding a basic keyboard user interface,and exported as a VST.
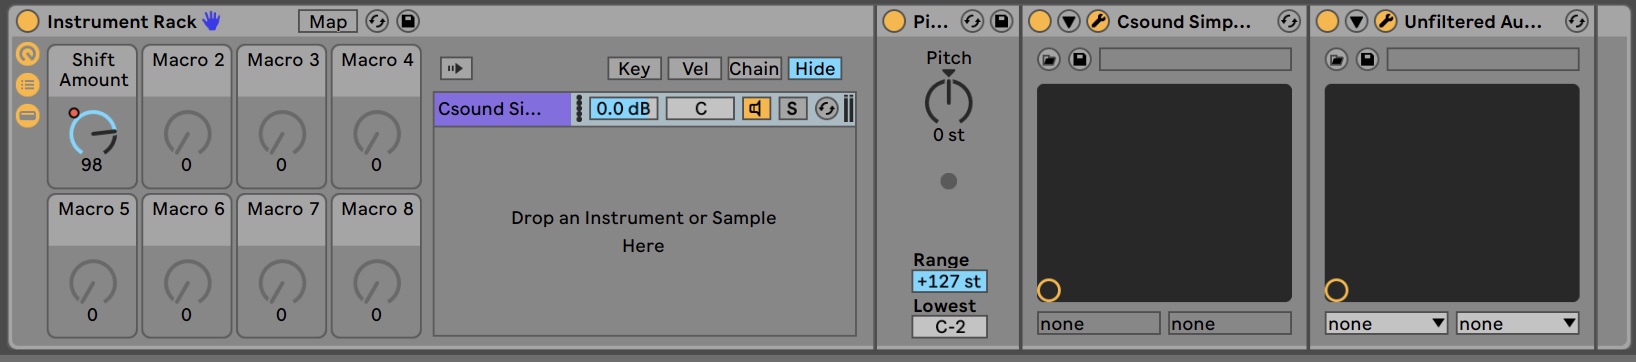
Once loaded up as a VST in Ableton Live, 2 oscillator VSTs were run in parallel (so effects could be added individually in ableton) These oscillators were then tuned so they were slightly out of phase, creating a movement and width to the sound.
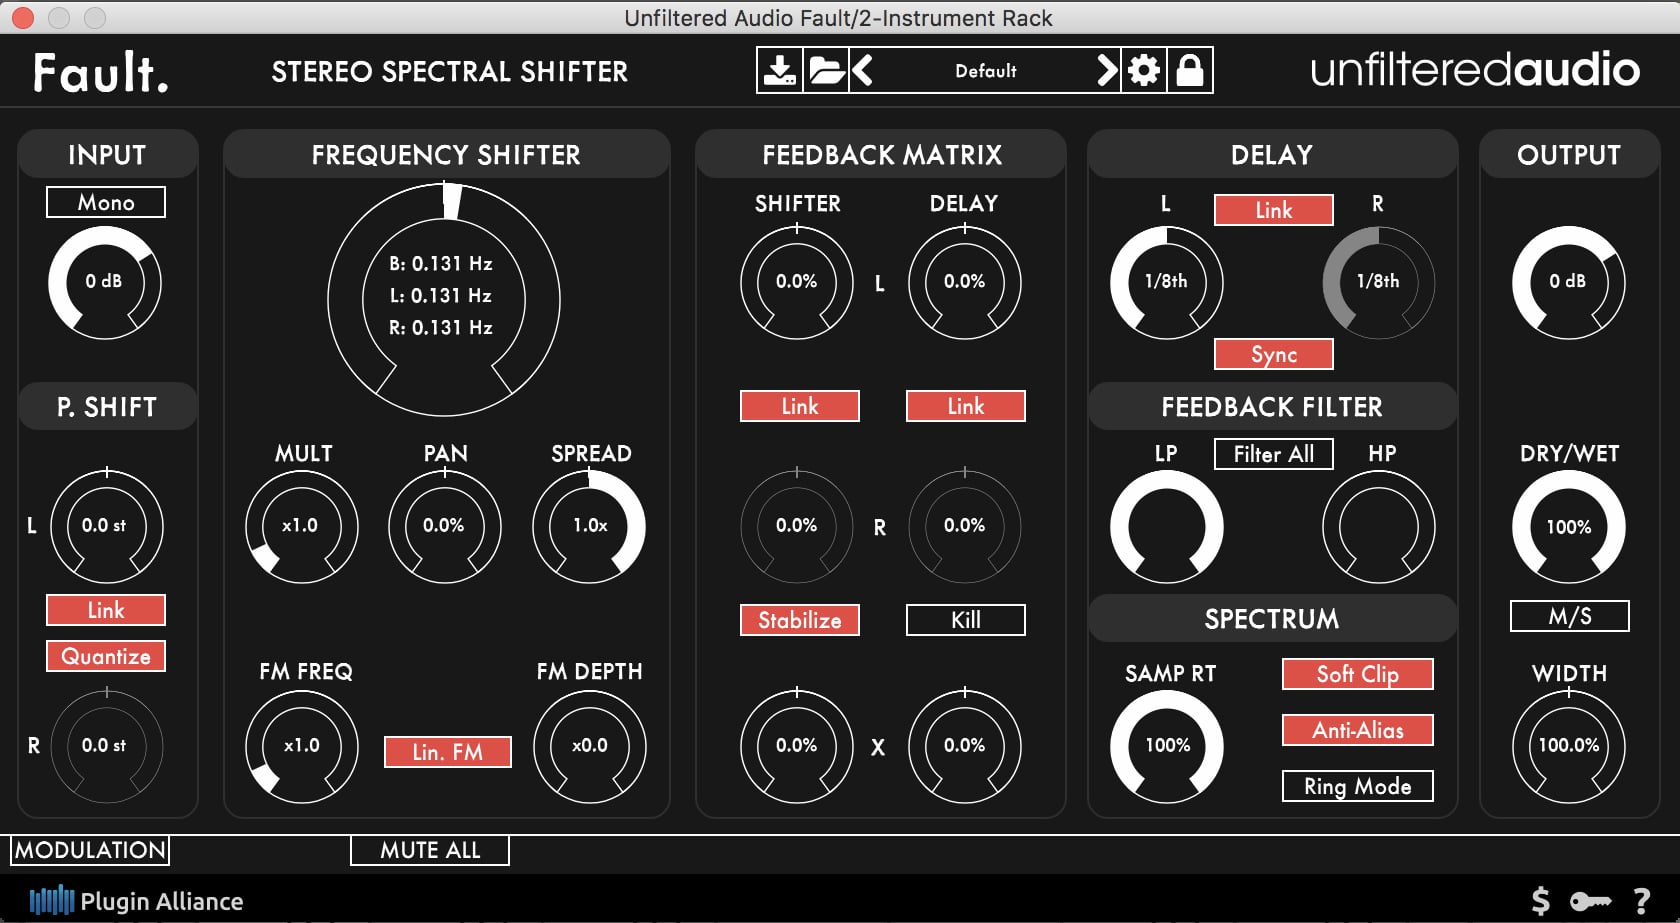
On the first oscillator a frequency shifter was added to morph this phasing further as a parameter for performance. The sound was staccato, a filter would be used later as a sculpting tool for composition and expression.
These two oscillators are then both combined and run through a fx chain to mould and build up the sound.
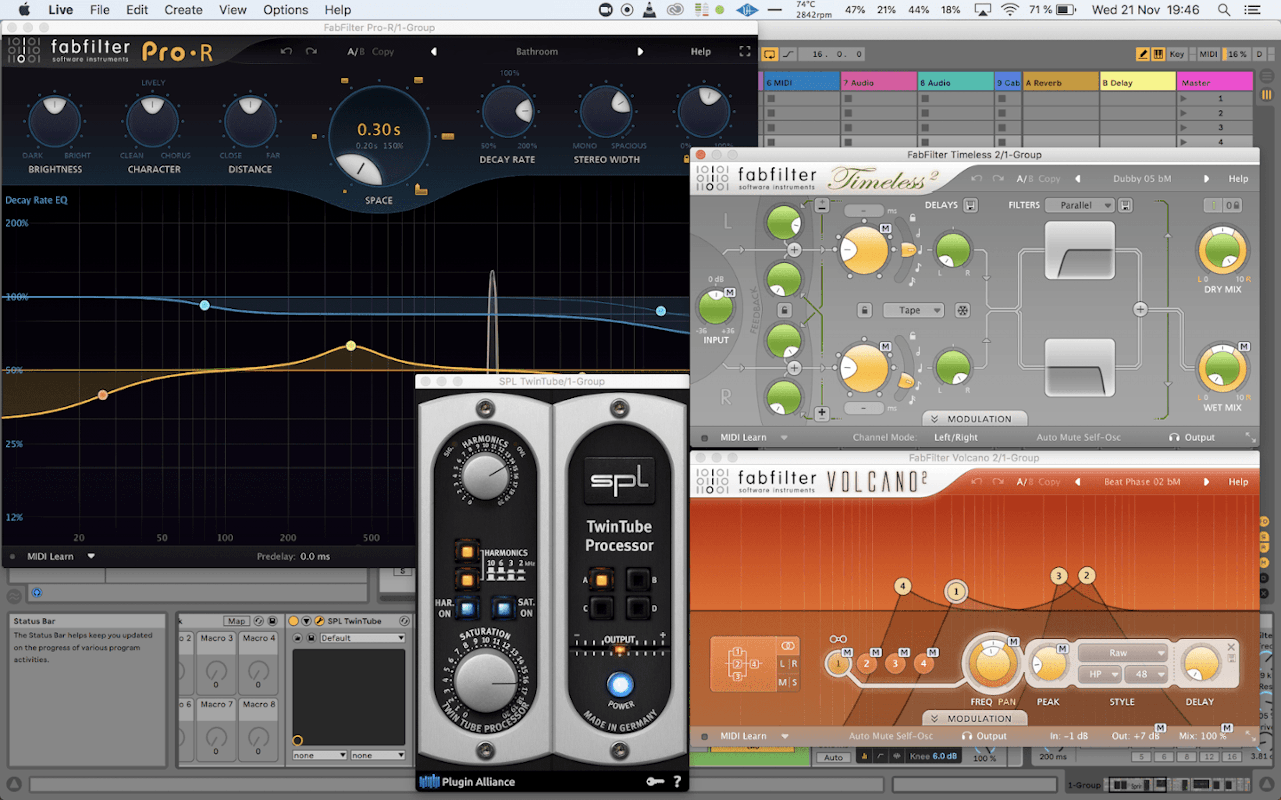
- SPL Twin Tube - Tube saturation for warming and condensing sound
- Fabfilter Volcano 2 - 3 bandpass filters modulating and phasing for movement
- Spring Reverb - Short timed delay, making phase distortions. (Delay timing mapped*)
- Ableton Compressor - Peak compression, lessen wild peaks in amplitude
- Ableton Auto Filter - high resonance low pass, crafting the sound (freq mapped*)
- Ableton Compressor - Sidechain ducking sound during kicks and snares
- Ableton Eq Eight - very small duck midrange around 400 hz
- FabFilter Pro-R - reverb adding space and washout effect (dry/wet mapped)
- FabFilter Timeless 2 - Long feedback delay (Wet level mapped*)
- Ableton Utility - take down the volume
- Ableton Limiter - Keep a ceiling on the volume


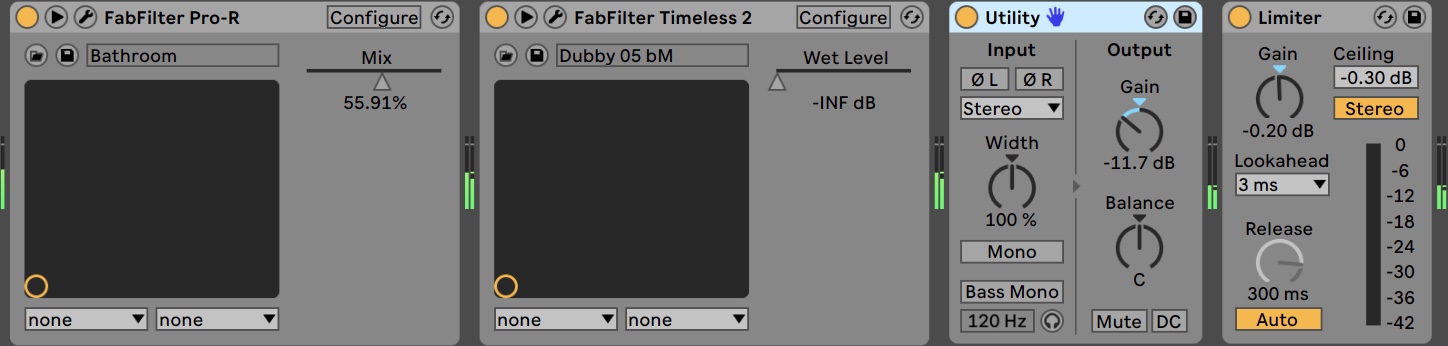
The instrument design was modeled for bass, creating a massive bass tone. However there was a mass of strong, heavy saturated mids and tops that can be “opened” with the filter. The reverb and delay were used for ambience, and could extend the sound.
During the performance It was used as a sub bed, staying in the low below 100 hz region. As the performance progressed, the sound would open on the filter more and more, increasing the tension. The fx chain created a lot of gain on the signal, shown by the utility taking it down towards the end. next time, it may be better to keep the signal a decent level. Or, maybe it’s better to keep it turned to 11 😉
Drums
A drum patch made earlier was also used in Sams Ableton Live project. This is a group of operator FM synthesised drums that are velocity sensitive, so you can have all the drums on one midi clip, and pitch them as well. They have been heavily processed previously. As stated before, the synth signal was ducked out during the kicks and snares (they were running silent as a ghost track to trigger the compressor)

Espen
Espen’s sound was basically made from a sample exported from an earlier made Csound program, which was the sound of a string. A new Csound program was made, and in Cabbage, controllers for volume, reverb, cutoff and dry/wet control were added. This was exported as a VST (plugin) and imported to Reaper. The sample of a string was then played through the plugin, which meant that the sample of a string was sent through a string, and then through the reverb and out. The parameters of the plugin was controlled with an AKAI MPK mini play, MIDI device. In addition to that, sound effects and and a BBC radio news clip from The Second World War, was played back from Final Cut Pro.
The radio clip opened and finished the piece. It was used more as a kind of “texture”. It gives the piece a voice that in the background is meant to trigger some kind of syntactical and historical resemblance, more than a given program or story. The sounds that were played had a relation to WW2, using a voice connecting on a human level to the audience in a subconscious way. The loud sound effects was more of a break - marking an abrupt change in the piece.
The Trondheim Team
Jørgen
Jørgen focused on exploring physical modeling of a string in Csound. He used waveguide synthesis to make two strings, and put one string inside the other, making a total string consisting of the two. he then added reverb on the output of the second string. More information on the DSP methods and signal flow is found in the flowchart if you click Jørgen’s computer-icon. To make this usable as an instrument and as a plugin, knobs were added to control the feedback-amount of the different strings. In this way he could tailor the sound the way he wanted. Autogain was added to prevent the output from exploding when adjusting these parameters. Knobs for controlling the reverb-effect, the cutoff for the lowpass filter on the strings, the frequency-shift, and the main output volume, was also added to the plugin. You can see the plugin in the picture below.
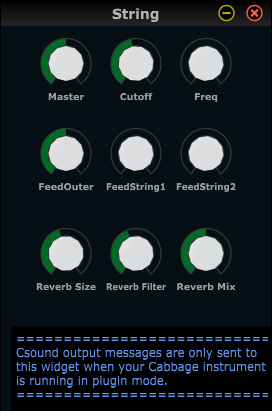
A midi-keyboard was used to start the instrument and to choose pitch, which could be held with a sustain-pedal. As sound-input to the instrument, a plank with a piezoelectric transducer (contact microphone) was used, and by scratching or tapping the plank, the signal would start its journey through the plugin, which shaped it to a “string-like” sound with the parameter-changes coloring the sound.
The resulting sound of the instrument was nice, maybe a bit thin, but that suited our group well in the performance, since the sound was routed through Sepehr’s instrument for further processing, and it was then easier to prevent a sound-mess.
It would be nice to continue exploring even more strings inside strings, and do more processing inside. Making strings in series together with strings in parallel could maybe thicken up the sound, but more fiddling is required to say.
Sepehr
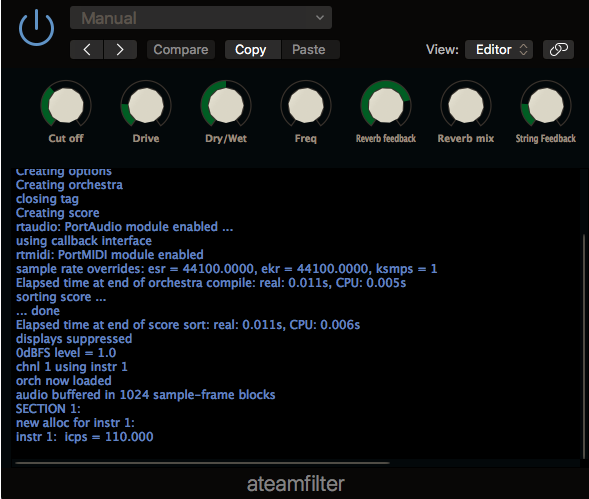
Regarding Sepehr’s way of processing the signal; like the others, he managed to export a plugin with the cabbage, based on Csound codes written before. There were several functions in the plugin, in which we shall go through one by one. First of all there was a Cut off function inside the string, with the focus on 110hz (cps) which was being controlled by the first knob in the plugin.
Then there was a reverb created within the string and it was being controlled by the the feedback and mix knobs in the plugin. Of course it needed to be controlled by autogain, which comes later in the chain.
Also, the signal was being driven via hyperbolic tangent function, which also was being controlled by a knob and after that being restored, gainwise. Since the feedback was an important factor in the string, that basically formed the sound decay and were really important for the cut off and drive functions; that was being controlled as well.
The feedback knob on the plugin was in charge of changing the pitch a little bit in order to prevent the feedback, which in this case was being used as an effect in the performance.
In the end, there was a low pass filter used to roll off everything after 20hz and the whole plugin was being controlled by a dry/wet knob.
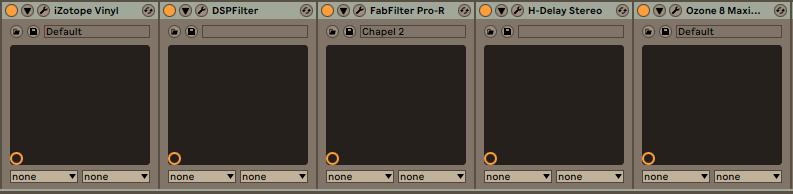
The other effects, used in the signal chain included:
- Izotope Vinyl: for creation of random percussive / vinyl dust / mechanical / electrical noises
- built-in plugin (DSPFilter)
- Fabfilter Pro R: in order to add some reverb in the desired places, using reverb time
- Waves H-Delay: Controlling feedback and delay time in order to create pitch and desired effects
- Izotope Ozone Maximizer: for limiting the output to avoid any sudden transients and loud sounds
The sound source for the process, was the sound being sent from Jørgen’s laptop and basically we could say we were playing a joint instrument. Therefore it was important to each others style of playing and sound design.
Team A