Pixel by pixel
The pixel sequencer is an interactive web app for sonification of images, written in Javascript, CSS and HTML. The user can upload an image, decide on parameters like size (up to 16 pixels horizontally and vertically) and sensitivity. The image is then pixelated, and colour parameters from the image is the basis for the sonification of the image.
The idea
Making music based on a picture is not a new thing. Recent artists, like youtuber Andrew Huang has experimented with the use of MIDI notes on a piano roll to create a playable picture. The different MIDI notes on the piano roll appear to be pixels that form a picture, and what you get is a composition that sounds like a musical piece. Andrew Huang’s Glorious Midi Unicorn is a neat example.
Another example of sonification of images is the Pillars of Creation made by System sounds. System sounds have among other things translated space images to music for NASA. The Pillars of Creation image is converted to sound using a version of the inverse spectrogram method. The horizontal axis from left to right is the dimension of time, and the position of light sources on the vertical axis indicates pitch. The brightness and structure of the nebula controls the volume of the composition.
Chance composition
Inspired by the beforementioned, as well as compositional ideas from the 60s fluxus-movement (John Cage and others), using i.e. chance and indeterminacy as a tool for composing, we decided to build an app for automatic sonification of images.
The pixel sequencer is a toy and a tool, it’s a way of mixing senses, a way of composing – leaving some decisions to chance. It’s interactivity, it’s making sonification and composition accessible for everyone.
How does it work?
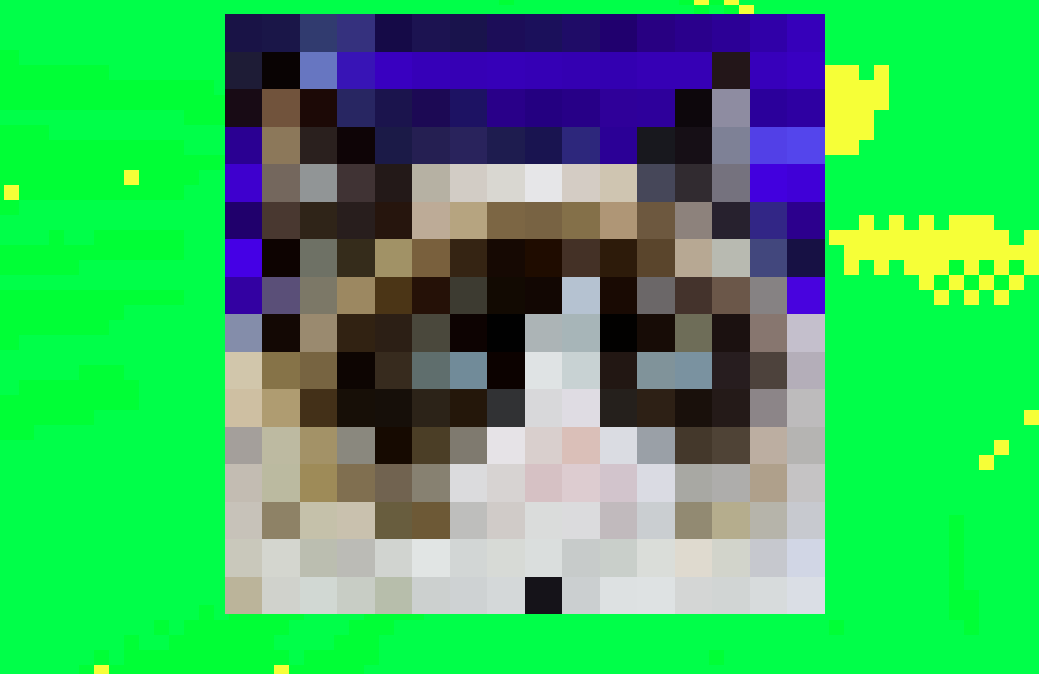
When uploading a picture, the picture is scaled down to max 16x16 pixels, making a square with big pixels in different colours. When you press play, each column (of up to 16 pixels) is played sequentially, and what you hear is determined by different values from each of these pixels.
Before loading a picture, you should select how many pixels you want to convert it to, in both directions, as well as adjust the sensitivity. The sensitivity determines how easily a note is triggered. Darker pixels are triggered as notes (fixed for each row), and brighter are not triggered, and the higher the sensitivity-value you set, the lower the threshold for triggering is.
According to the number of rows (vertical parameter) you end up with, the more complex synthesizer you’ll have. As stated before, when hitting play, the whole column will determine what you hear. If you have only one row, you’ll only hear one note when triggered. With two rows you’ll hear two different notes triggered, not necessarily at the same time; that depends on how bright/dark pixels in the same column are.
As the complexity grows with more rows, it’ll be harder to audibly understand everything that’s going on, as effects and envelopes come into play as well.
Here is a short demonstration of the sonification of the same picture with the same settings, only added one row for each loop:
The mapping
Just like System Sound’s Pillars of Creation Sonification, the pitch values are mapped to the vertical axis, and the time values are mapped to the horizontal axis. In the development of the app, we have been trying out several different ways of mappings, but in the end, we figured that since most people are used to perceive the horizontal axis as time in visual representation of music, we’d do the same here.
As the brightness value is deciding on and off of a note (dark colours indicate that the note is on and bright colours indicate that a note is off), it would not make much sense to use parameters from the same note to change other parameters, as the note would be off anyway if it was light. Therefore we explored how we could use the colour values from pixels next to or below the triggered note to change other parameters (like effects and harmonicity of the synth).
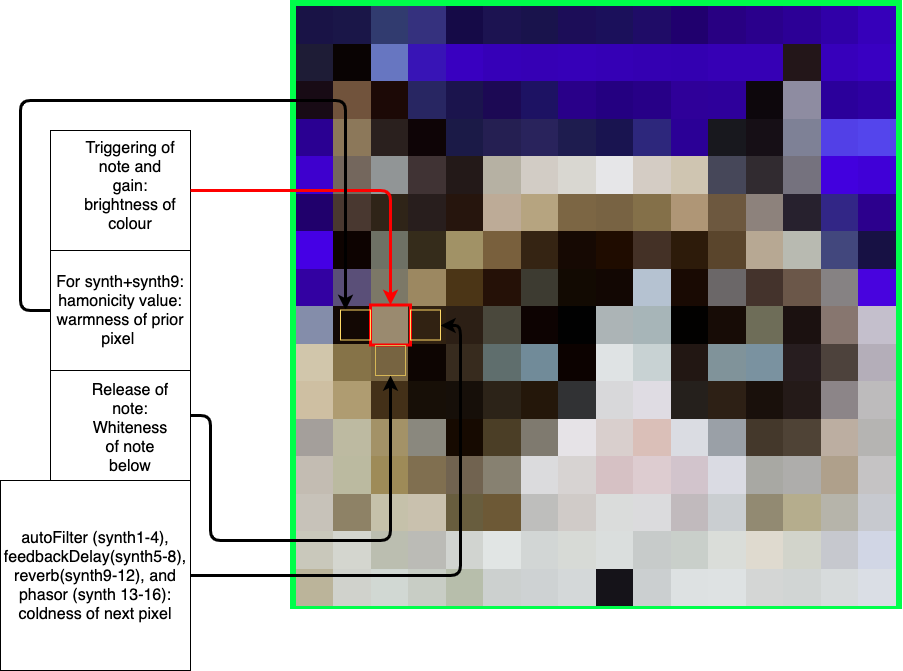
Along the way when developing the application, we have been forced to take decisions on how the different parameters from the image should be mapped to different audio parameters. With up to potentially 256 pixels, and 16 synths with several effects, the possibilities are close to infinity. We have been editing and testing along the way and tried out many different mappings, and after a while, and also due to time, we came to the conclusion that we should keep it as simple as possible. We have built a framework that can be expanded upon in the future.
We ended up using 16 different synths, and four of these were pre-programmed and designed by Sebastian with some fine-tuned parameters. The remaining synths are very simple AM Synths from the Tone.js library. In addition to this, we have used four extra effects: autofilter, feedback delay, reverb and phasor.
Drum machine
The four rows on top of the pixelated image-sequencer, works like a simple and easy-to-use step-sequenced drum machine, where you activate each step and instrument by pushing the corresponding button. With bassdrum on the lower row, snare over that, and closed and open hihat on the the two upper rows, it’s very easy and fast to make a simple beat to play along with your image. All drum sounds where made on a Moog Voyager and a Polyend/Dreadbox Medusa, recorded and processed (some EQ, compression + reverb on snare) in Logic and exported as short wave-samples. The plan was to add more drumsets for users to choose, but in the end the drums are just an addition to the pixel sequencer, rather than a fully working drum machine. Still, the drums has a nice synthetic 80s vibe, and is useful for complementing the synth, and it specially can be a nice addition when you choose an odd horizontal dimension on your image, creating polyrhythmic between the synth and the 16 steps drum machine.
Back to the future
The aesthetics is very inspired by early late 80s/early 90s video-art, and the MTV-aesthetics of the time, with bright/vivid colours, low quality (large pixels), monospace fonts and a somewhat noisy look.
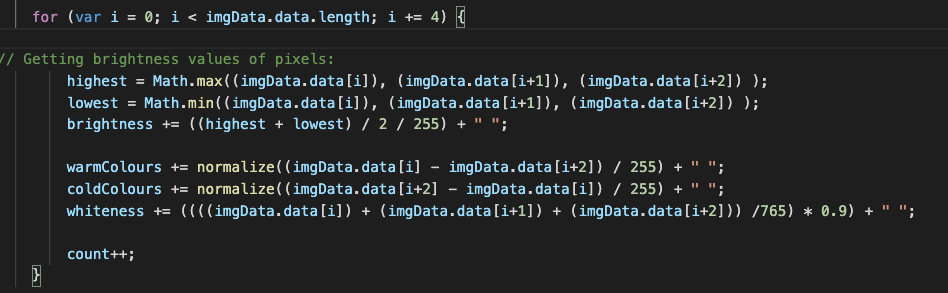
Code & pseudo
Sebastian and Anders had very little experience with Javascript, CSS and HTML, so the threshold was a little high for us. The boys’ initial thought was to use Csound and Python for the task, and the team talked about using HTML and Javascript for the interfacing, since Mari had experience with that. But we soon understood that it wouldn’t simplify anything, just add more complexity. And when Mari already had a quite nice prototype for the basic idea running, it seemed like a good idea to go with that. So after some learning from Mari, we started working on each our ends, Anders drafting a pseudo-code, trying to imagine how tone.js could work, and how different values from pixels could be mapped to sound. Mari and Sebastian tried their best to understand the pseudo, and the complexity of the code and the produced sounds grew quite fast.
In the end-result, Mari took care of the main coding, Sebastian worked with synthezisers in tone.js, and Anders recorded synth drums and got the drum machine playing drums, as well as tweaking the design to fit his youth. In addition we all tried to get the grasp of both Javascript, HTML and CSS.
The MIDI rigidness vs. the RGB randomness
When using RGB data of an image as a starting point for sonification, one could wonder what the purpose is. An image could basically be anything, so why not just use a random generator instead? It indeed depends on how the system is used. The element of chance is key. The system affords an infinite number of possible sonifications, according to how the user decides to use it. Also one image could “sound” in so many different ways, based on the number of different dimensions that are decided upon, as well as the sensitivity value.
There is nothing scientific behind the choice of mappings between parameters; everything has been aesthetic decisions based on what we think sounds intuitive and pleasant. The way MIDI values are mapped to vertical axis and the time is mapped to the horizontal axis is not a groundbreaking way of thinking of visualisation of music. So there is a contrast here between the rigidness of MIDI and the randomness of RGB. We believe that it works together and kind of makes some system in the chaos. The idea is that the user should be able to see how there is a link between the image and the sound, and we believe that we have been able to achieve this with our mapping.
We have made more of a system for sonification than just a sonification piece. While sonification of images is not a new thing, we have yet to see an online application that allows the user to upload a picture and sonify it in real time. So we hope you enjoy our pixel sequencer!