Sync your synths and jam over a network using Sonobus
Introduction
In this post we are going to use Sonobus to set up a simple jam session between two locations over the internet, designed for electronic instruments with a built in sequencer. The primary location (referred to as the ‘Hub’) will send audio alongside an analog clock pulse. The secondary location (the ‘Node’) will receive these and in turn, send back it’s own audio. There are multiple ways to achieve this effectively, here’s just one way to do it. This technique is referred to as Forward Synchronisation.
Equipment/software checklist
The equipment/software both locations will need are as follows:
- Network cable (plus USB adapter if necessary)
- Sonobus software (with plug ins)
- External sound card (with 3 or more outputs for the Node)
The Hub also needs Ableton Live or similar DAW that can delay individual tracks.
You may have to adapt this setup to match the instruments you want to use. At the Hub, I used a Roland TR8s drum machine connected to Ableton Live through USB midi. At the Node, a KORG Monologue which receives analog clock from the 3rd output an external sound card.
Sonobus is free software which enables peer to peer transmission of audio over the internet. You can download and read more about it here. Sonobus is also available as a plugin so you can run it from inside your DAW of choice.
Step 1 - Connecting to a network
Although it is possible to use Sonobus over wifi, it is highly recommended to use a network cable. From my testing of this setup, not using a cable increases the latency by around 80ms, enough to make playing any type of instrument feel uncomfortable. Once you have connected the cable, the Node should find their IP address by looking in the network settings on your computer.
Step 2 - Starting a session in Sonobus
The node can now open Sonobus and click ‘connect’. This opens a menu where you can give your session a name, an optional password and choose a display name (this can be handy to label yourself ‘Node’). Under the ‘connect to group’ button there is a box called ‘Connection Server’. Here you can enter your IP address. The last thing we need to do is allocate a port number. For Sonobus, this is 10999. The IP address and port number should be separated by a colon like this:
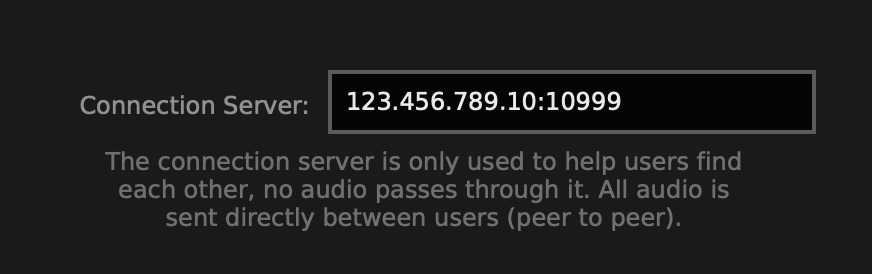
Once this is entered, click ‘Connect to Group’. If it fails to connect, double check your IP address and consult the guide on the Sonobus website. Copy your IP address and node to send to the Hub because they will need to enter the same information.
Now the Hub can also open Sonobus but this time as a plug in in Ableton Live. I recommend using Sonobus on a return track. Input the same information as the Node (except change the display name to ‘Hub’) and click connect.
Step 3 - Sending audio
The Hub can make a new track, make sure you have signal coming in and sync with Ableton Live in which ever way suits your set up best. For me this is through USB Midi. For the purposes of setting up and adjusting the connection, make a simple sequence that it easy to rhythmically hear (like a metronome or 4 to the floor kick with a short decay time). Next make the track ‘sends only’ and send signal to the return track with Sonobus on it. If you open the plug in, you sound now see signal coming in, being sent to the Node and hear it from the return track.
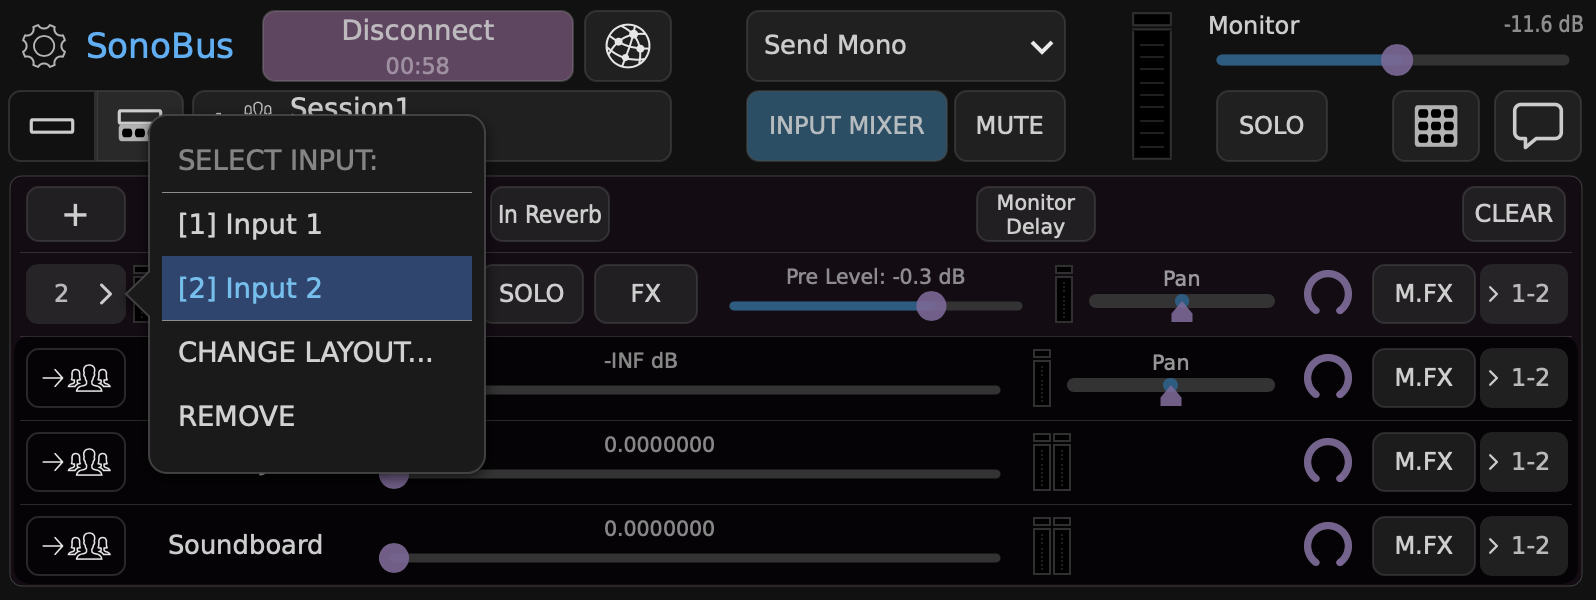
The Node can also set up their instrument and send audio back. Check the correct sound card is selected and that uncompressed audio is being sent (PCM 16 bit) in the global settings. Clicking the ‘Input Mixer’ opens more settings to select the correct input channel.
Step 4 - Sending clock
It is very important to remember that clock pulses are extremely loud so remember that everyone should remove headphones/mute outputs while we set up the clock. The Hub should make a new Midi track with a Drum Rack on. We are going to send a sample of an audio pulse every 16th note. This article from Ableton links to a free download of an audio clock pulse and has some further information on syncing modular gear with Live.
Make a new return track with a fresh instance of Sonobus. Connect to the same session as before with a display name ‘Clock’ and mute the Hub and the Node. A mono signal is fine to send here (this can be changed in the top centre of the window) but make sure the clock is also being sent as uncompressed audio. Now follow the same audio routing as before except send to the second return track. Go back to the first instance of Sonobus and mute the clock.
Now the Node should be receiving the clock signal. This can be routed out the 3rd output of the sound card and into the sync input of the instrument. Check that you are not hearing any clock in your headphones. Now test that the clock is reaching the instrument and that control of start/stop transport is taken over by the clock. You might have to adjust some settings on the instrument for this to function correctly (it is possible to skip this step and just start the sequencer manually on the first beat).
Step 5 - Synchronizing latency
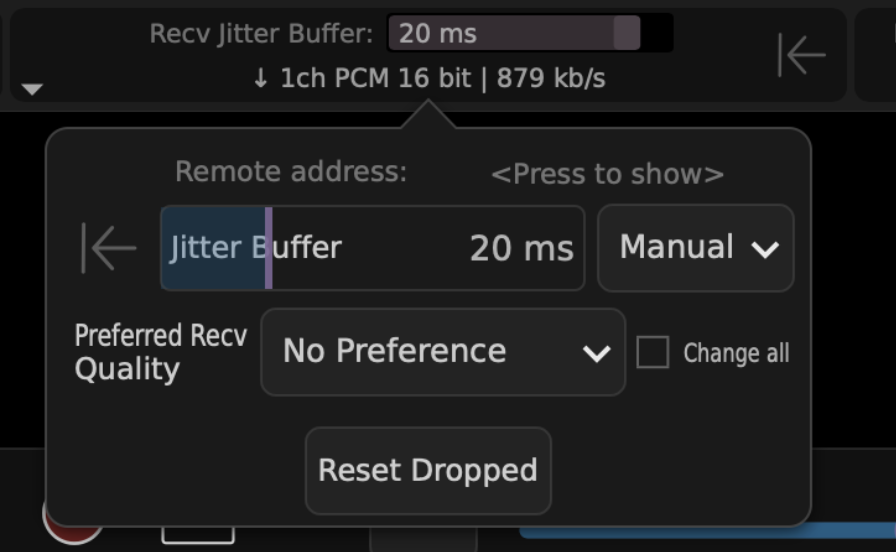
Finally we need to synchronize the instruments. This can be a bit of trial and error because we are trying to find a balance. The ideal situation for the network is to have a large delay buffer, but the best thing for us playing the instruments is to have as small of a jitter buffer as possible. First the Node should go to the clock and set the latency to manual, a good number to start with is 20ms.
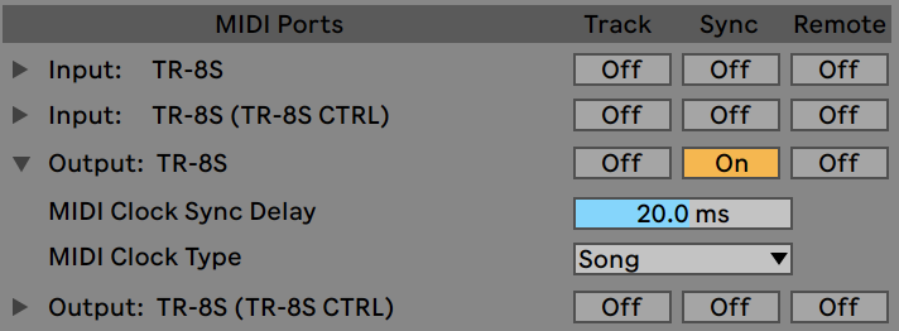
Next the Hub also needs to delay the clock being sent to their instrument by the same amount. In my case, I can delay the Midi clock in Ableton’s settings.
Finally both people need to adjust the latency of the audio they are receiving and the monitor audio of their own instruments. As before with the clock, set the jitter buffer to 20ms. Then delay their own monitoring by opening the input mixer and clicking the button M.FX. The Additional Monitoring Delay button should be highlighted blue when activated.

Testing and tweaking
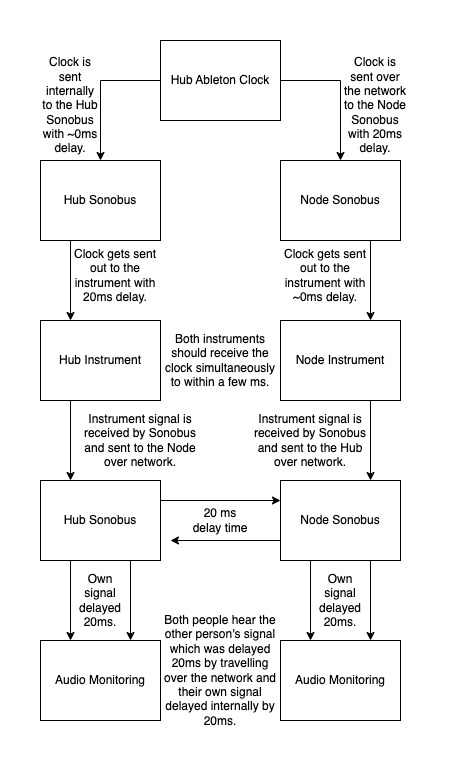
Test out the connection by starting and stopping the clock, getting it running in time and waiting to see if it goes out of sync. If this happens, repeat the steps in this section with a higher number, remembering to change all settings to the same number. If you are hearing some latency but the timing seems consistent this could be down to latency within your system (all setups have some degree of latency) so you can manually adjust the Additional Monitoring Delay until the instruments synchronize. Underneath is a flow chat to help visualise the signal path. Good luck and happy jamming!