Live Streaming A Telematic Concert
Massive development in network technologies and passing through a strong pandemic make telematic performances more and more common every day. Today, splitting your band to different locations and playing music together and in real-time is not a big deal. It’s not only that the performers are lazy for a meet-up in a concert hall, but also the audience is becoming more remote in time. If you want your show to reach people, you may have to live stream your telematic show!
When it comes to streaming a telematic performance, a couple of things may be essential. Primarily how you represent multiple venues may be crucial in terms of transmitting a telematic feel. Also, being aware of technical obstacles may help you on the go. In this blog post, I gather thoughts and advice based on my experience and observations on telematic concerts throughout the first semester in MCT.
Equipment
There are tons of equipment that can go well in your streaming setup. However, you can perform an excellent live stream with just a few. Below are lists of must-have and good-to-have equipment. You don’t need any specific equipment when live streaming a telematic show. But remember that quality streaming/recording starts with the right equipment.
Must Have Equipment
- PC
- Video Source (Camera, Webcam, PC Screen)
- Audio Source (Mic, Mixer, Audio Interface)
- Internet Connection
Good to Have Equipment
- Multiple Cameras - possible on different locations
- Mixer, Audio Interface
- Camera Control Interface
- Lighting Solutions
- Headphones
- Streaming Software
- Post-Production Software
- Bonus: A Friend Watching Your Stream Live
Fork in the Road: Streaming One Place or More
One of the essential duties of a director is creating a space perception in their audience’s mind. It’s a bit tricky when it comes to a telematic performance. There are different places, and you have to make your stream represent the multiple places properly to the audience without killing the telematic vibe. In my opinion, to transmit the most telematic experience to your remote audience, the best setup is doing the mainstream from one room (filming the physical screen) and showing cameras from other rooms occasionally (e.g., only in opening and introduction speeches). This will draw an excellent telematic picture!
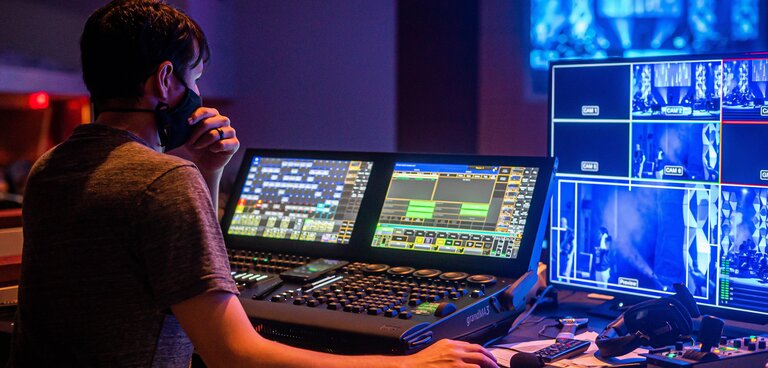
If you are livestreaming using cameras in different rooms, consider going split-screen and labeling the videos to highlight the telematicity.
If you would like to live stream mainly from multiple rooms, make sure you still represent a telematic ambiance. For example, don’t stream using cameras from different rooms sequentially without showing the screens in the rooms. Otherwise, it may seem as if they were different cameras in the same room and could not transmit the telematic spirit. You may also think of going split-screen and labeling the videos (e.g., Science Library in Blindern and RITMO Lab in Gaustad) to highlight that the performers are at different locations.

Filming A Screen
Simply, cameras are designed to film humans and objects, and screens are not designed to be filmed by cameras. Even so, having screens on the stage inhered in telematic setups may lead to problems you may have to cope with.
Screen Brightness and Color
Too bright or too dark screens can be an issue when using cameras. Even though human eyes are perfect at seeing bright and dark in the same frame, that’s not the case for cameras. In such a scenario, first, try to adjust the cameras’ diaphragm and aperture settings. If it doesn’t help, try changing the light flashing on the monitor or projection screen.
Refresh Rate Issues
If your screen is flickering or banding, although screens have different technologies, the underlying cause is similar: the camera’s framerate doesn’t match the monitor’s refresh rate. A monitor’s refresh rate is how many times the picture is changed in a certain amount of time. On the other hand, a camera’s refresh rate represents the number of pictures taken in a certain amount of time. When they don’t match, problems begin. You can fix it by setting the camera’s fps to multiples of the refresh rate of the screen.
Important Things to Remember
- You may have the audio slightly offset when you take video and audio from different sources (e.g., video from cameras, audio from a mixer). Remember to synchronize them before going live. Most streaming programs (e.g., OBS Studio) have built-in tools to shift the audio slightly. For testing, you can either run a test stream and watch it live or run a test recording and check it on your local machine. If you are recording only, you can use post-production software (e.g., Adobe Premiere Pro) to automatically synchronize everything you recorded. See this article to see how to sync audio and video in seconds: https://www.evercast.us/blog/syncing-audio-in-premiere
- If you are filming a screen, you may experience poor color quality. Remember to fine-tune the screen’s color settings (e.g., TV, projector) to make sure it looks cool on the camera.
- To overcome flickering when filming a screen, try changing the refresh rate of the screen to multiples of your camera/stream refresh rate (when streaming 24 fps, the screen refreshes at 48 or 96 fps)
- Consider different platforms, device types and screen orientations.
- Running a test stream beforehand always helps!
- Always have the stream open.