An introduction to automix
What is automix?
Automix is an algorithm originally developed by Frank L. Clemet and Bell Labs, but popularized by its implementation in the Yamaha CL and QL digital mixers in when they released it as a product of the collaboration with legendary engineer Dan Dugan, under the name Dugan Automix. After its Widespread popularity, the algorithm has been copied by almost all major console manufacturers and comes as a standard tool, either as an insert effect or on a channel basis.
In a brief summary, you could say that automix is an automated way of doing the engineers job when trying to avoid feedback and unwanted ambience when mixing multiple microphones at the same time.
Typical uses are:
- Theater or musical play.
- Panel debates.
- Conferences.
- A loud stage with multiple vocalists.
Under the hood of automix
At first glance, automix might look like your regular old expander or gate, but what makes automix special is that it does not only work on a channel to channel basis, but links all the channels in an automix group together and opens up the channel that has the strongest signal, while ducking the others. Another feature that makes automix different from a gate or expander is that it does not operate with a set threshold that is absolute, it simply prefers the channel in the group with the strongest signal, regardless of its absolute amplitude.
Automix on the Midas M32
The Midas M32 has two automix-groups - X and Y -, able to handle eight channels each. To assign a channel to a group you simply select a channel with the “select” button over the fader, press the “Home” button next to the main screen and page up or down with the arrow keys until the parameters on the bottom row of the screen says “Automix group” “Weighting” and so on.
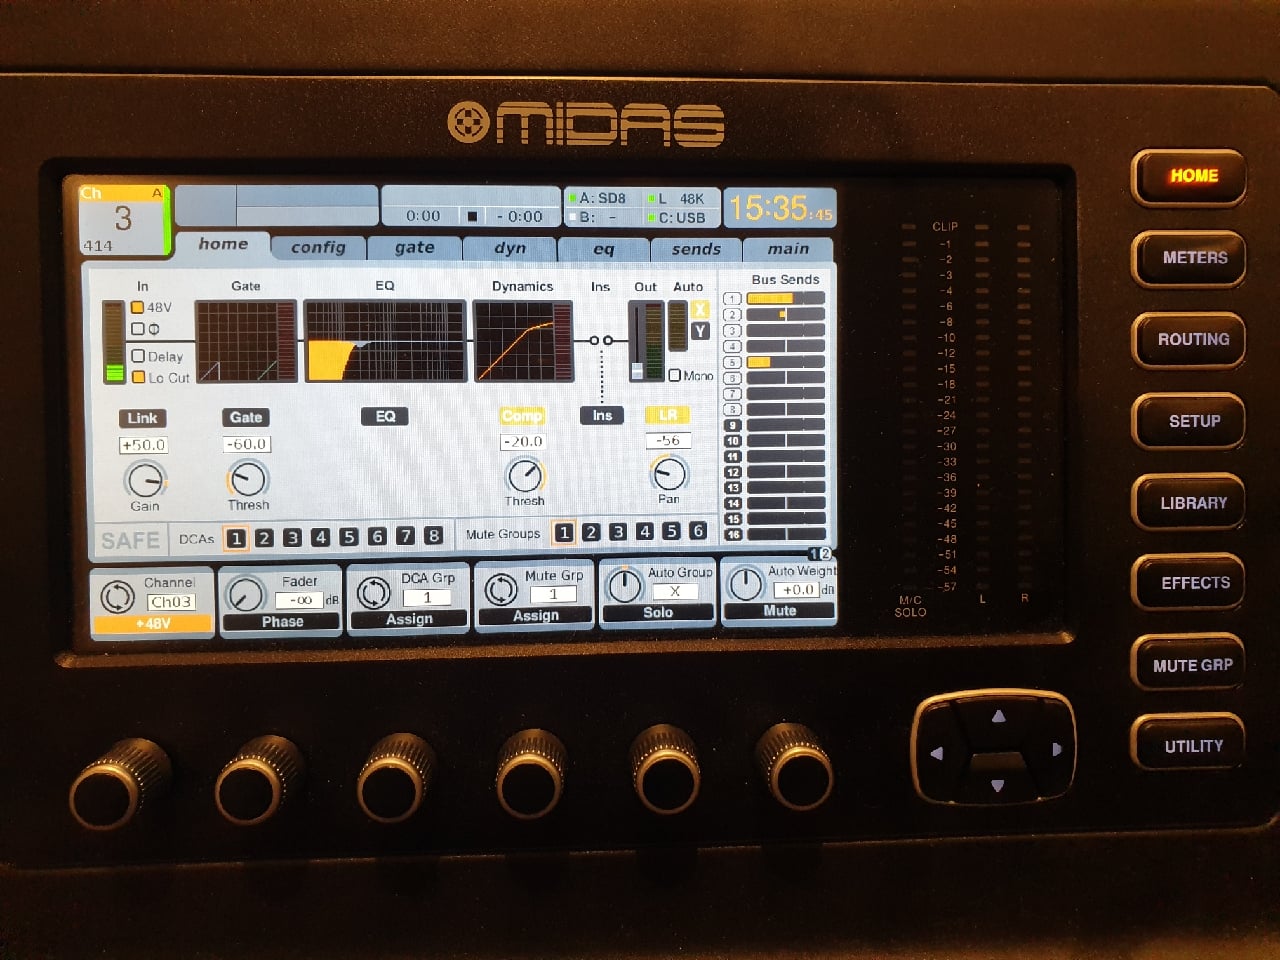
To assign a channel to an automix group, simply turn the encoder below the text box that says “Auto group”. In most cases you will only need to use one group, so assign the channel to group X. Repeat this process on the other channels you want to assign to the same group. The “Weighting” -option should be used if you want to prioritize one microphone over the others, for instance the teachers podium-mic over our table microphones in the classroom.
To see the automix in action, press the “Meters” button next to the screen and scroll over to the tab named “Automix”. The meters you see correspond to the gain reduction happening on the channels assigned to that automix group. Try pushing up the faders of the relevant microphones to equal level and you will see the meters on the automix dancing up and down in correlation to what microphone has the strongest signal. Try speaking into one of the microphones and you will se the meters opening that channel up while simultaneously pulling the others down. Getting used to how this looks visually will give you a good impression of what is happening inside the mixer.

That’s it! Even though it seems like magic at first glance, it’s not. Automix is just a really handy tool to use when you are working with multiple live microphones, but you don’t want to have them all open at the same time.