KineMapper
Introduction
KineMapper is a framework for motion control in music. It is a free and open-source Max for Live device which receives motion data from a smartphone via OSC (Open Sound Control) messages. Using the ‘Nodes’ object in Max, this data is translated to 8 mappable dials which are able to control parameters within Ableton Live. The key advantages of KineMapper are as follows;
-
Flexibility - KineMapper encourages the user to develop motion controlled instruments through freely experimenting with different mappings in Ableton Live. Outputs from KineMapper could be mapped to sound parameters, arpeggiators, audio effects, triggering clips and so on.
-
Easy to use - The system is designed to make connecting devices simple and once connected, the transparent mapping of motion to sound makes for a fast learning process.
-
Ubiquitous technology - KineMapper uses technology that you probably already have so there is no need to invest in expensive specialist equipment to start experimenting with motion and music. A full list of requirements can be seen below.

List of required technology
- A smartphone.
- An app for transmitting motion data via OSC (I recommend GyrOSC).
- A computer running Ableton Live Suite (for Max for Live devices).
How does it work?
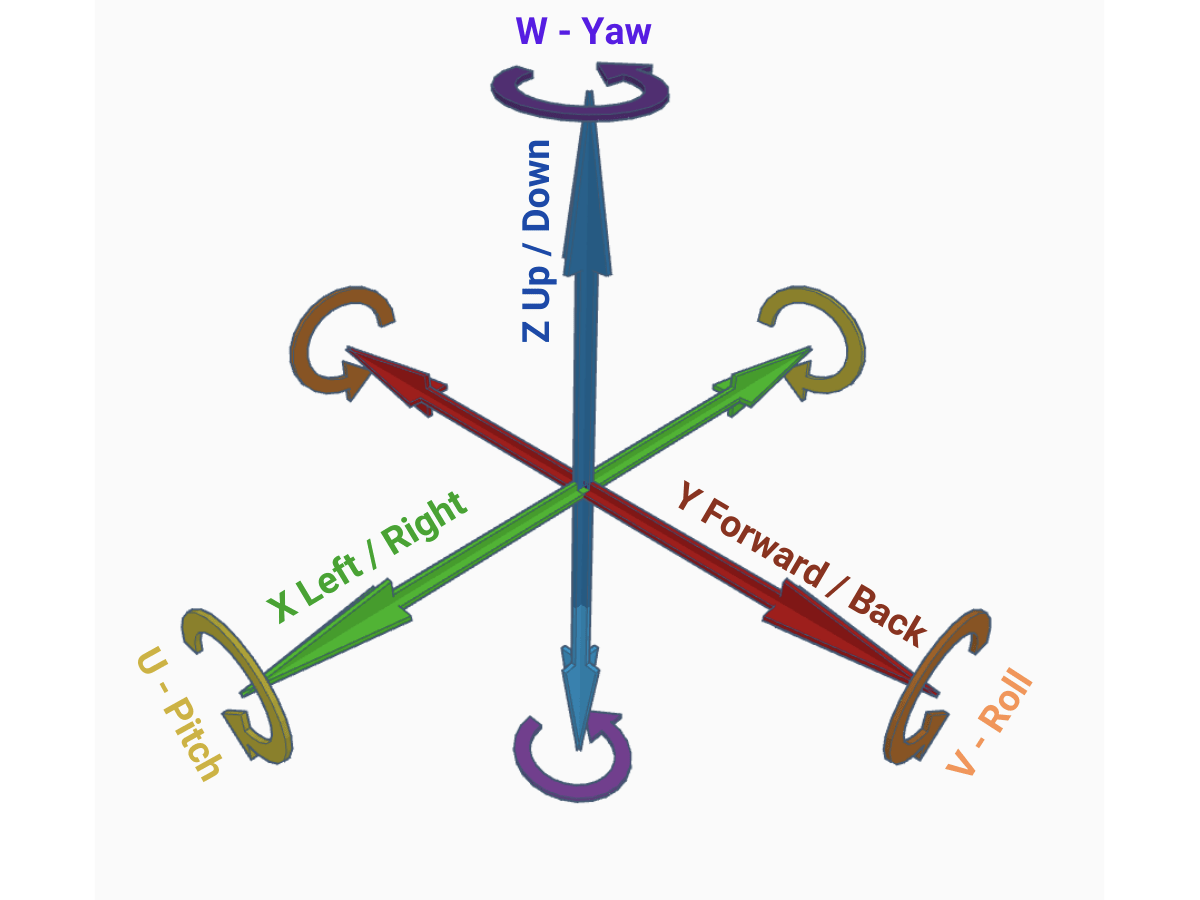
KineMapper works with data from the gyroscope inside your phone. This means rotational movements are detected rather than linear or translational movements. The difference between rotational and translational movements can be seen in the image below. (Image from ‘What are the “6 Degrees of Freedom”? available here.)
KineMapper is designed to work with the iOS app called GyrOSC, although adaptations can be made to function with any compatible smartphone application.
What is OSC anyway?
OSC (Open Sound Control) is a protocol for sending messages between computers and musical devices. OSC messages are similar to MIDI messages in their function - they can be used to achieve the same result - although there are some key differences between the two.
- OSC messages are sent via a network, this can be through ethernet cable or WIFI connection.
- MIDI sends integers between 0 and 127 whereas OSC can send many different types of message, including strings of text, integers and 32-bit floating point values.
- MIDI messages are labelled in a fixed way but labelling of OSC messages is much more flexible.
For a more in depth overview of OSC, check out this blog post.
How to connect devices
In order to send and receive OSC messages, both devices must be connected to a network. To get the best results when using KineMapper, use an external router which is not connected to the internet or activate the ‘hotspot’ feature on the smartphone (this does not use up your mobile data allowance). Connect your computer to the same network as the smartphone. Find out the IP address of the computer and enter this into the smartphone app - this will let the app know where to send messages to.
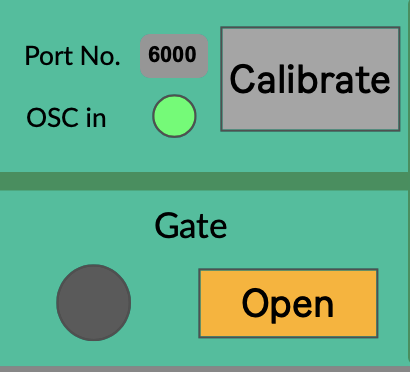
The app will also ask for a port number. The default port number for KineMapper is 6000 but this can be changed by opening the Max patch. The port number is contained within a message box in the top left of the patch. Ports can sometimes be used by other tasks your computer is running, so changing the port number can be a good place to start when troubleshooting. Click the message box to start a connection. If a successful connection is made, the light should flash green.
Summary:
- Open the Max for Live device on an audio or MIDI track in Ableton.
- Connect both smartphone and computer to the same network.
- Open GyrOSC and enter the IP address of the computer.
- Set the port number to 6000.
- Click the message box ‘6000’ in the top left corner of the Max for Live device.
- A green light indicates a good connection.
Now for the fun stuff … almost.
Calibrating KineMapper
Before KineMapper can be used effectively, a calibration process must be carried out. This process tells the device the size of space you would like to use the controller in by measuring the maximum values expected for each axis of rotation on the gyroscope.
Calibration is done by pointing the controller towards the centre of this imaginary space and pressing the ‘calibrate’ button. Next move the arm left and right to the edges of the imagined space. Then, return to the centre and move up and down to the edges. Finally, return to the centre and rotate the arm left and right remaining in the boundaries of what is comfortable. Click the calibrate button (‘now labelled as ‘stop’) once more the end the procedure.
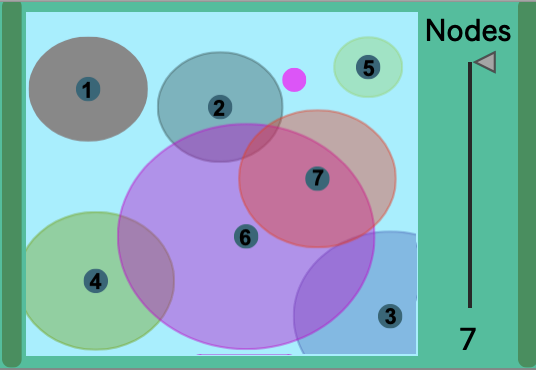
Nodes
Nodes is a Max object which uses a pointer to navigate on a 2d surface. On this surface, ‘nodes’ can be placed at specific position. Nodes have a circle around them, the size of which can also be altered. The object outputs a value between 0 and 1 based on the proximity of the pointer to each node. (The pointer must be inside the boundary of the circle to register a positive output.) The pitch and yaw (left-right and up-down) rotation of the smartphone is mapped to the X and Y coordinates of the pointer. Basically, the pointer follows where you point. KineMapper can have up to 7 nodes by default (this can be edited inside the Max patch).
Extra features
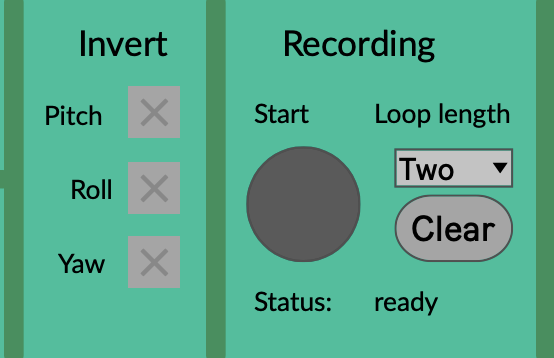
KineMapper also boasts a motion record feature where data can be recorded over a period of 1, 2 or 4 bars (synced with Ableton’s clock). After recording, the data is played back in a loop and new data coming in is stopped. This allows the user to experiment with a loop of movement, record it then move on to interacting with another device.
Incoming data can also be gated and each axis inverted independently.
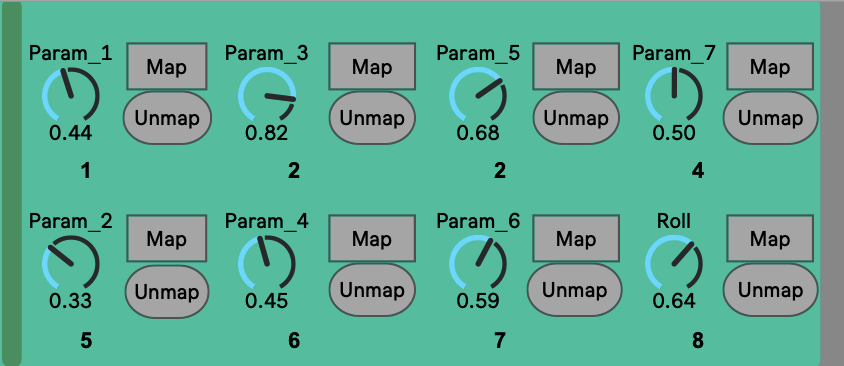
Mappable dials
The final output of KineMapper is 8 mappable dials which you can use to control anything in Ableton which is able to be mapped. 1 - 7 represent each node value and the 8th is linked to the roll axis of rotation. (Note: roll also alters the size of the pointer for visual feedback but this does not have any effect on the outputted values from Nodes. Click the ‘map’ button followed by the parameter of choice in Ableton to create a mapping. Click ‘unmap’ to reset the mapping.
Pro tips
- Press cmd/ctrl+m in Ableton to see all mappable controls (shaded in blue).
- Don’t make your space to big while calibrating, otherwise you might not be able to reach the edges. This is especially relevant for the roll axis as twisting the wrist can be a little uncomfortable.
- If you can’t connect, double check the IP address or try changing the port number.
- Open GyrOSC facing the direction you want to use the device.
Happy motion controlling!