Making virtual guitar playing feel more natural
The Task
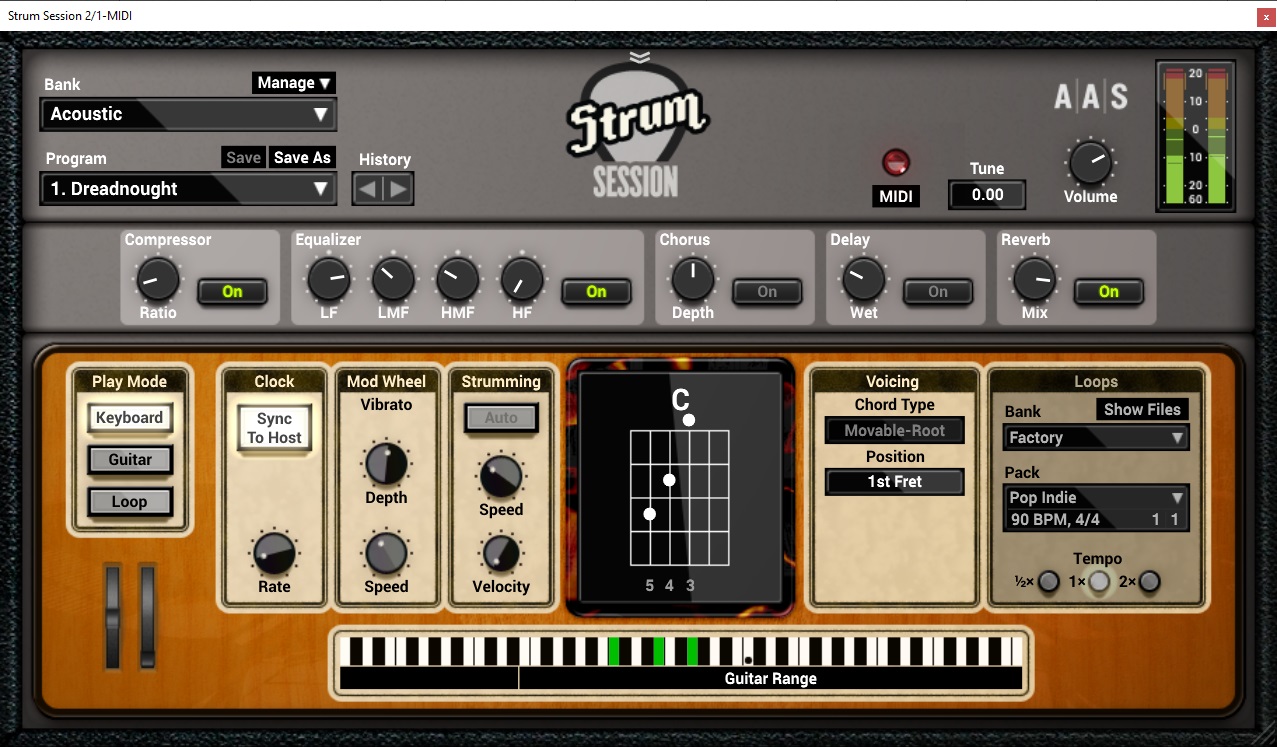
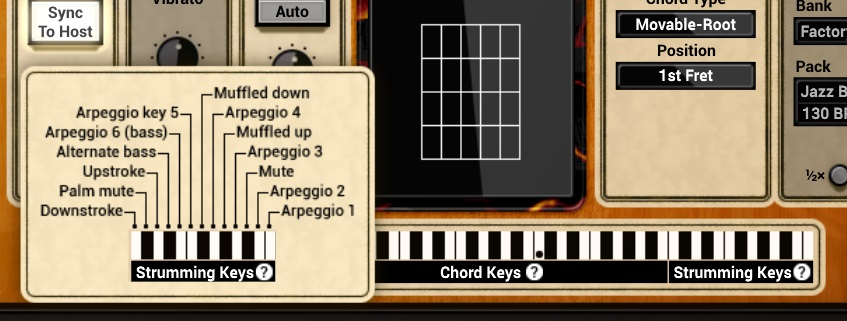
We were given the task to create “an interactive system which you will present as a short musical performance” using any software that might suite our needs. I had recently written a song using a VST called “Strum Session” which has electric and acoustic guitar sounds, which can either be played in the same way you would play a piano, or by holding down the chord you want to play and triggering an “up strum” or “down strum” using the lower “c” and “d” midi notes on the keyboard.
The Idea
My Idea was to use two phones; one in the left had to determine the type of chord you will play, and one in the right hand for strumming.
In the left hand, the user can press buttons on the phone’s display to determine the root note of the chord, then tilt the phone at different angles to determine the type of chord (major, minor, seventh).
In the right hand, the user would be able to hold the phone as though it is a giant plectrum and move their hand up and down to strum the guitar.
The Implementation
I used oscHook on both phones. In the left hand (the phone determining chords) I am sending only the pitch orientation value of the Compass as OSC data to my computer and from there I send the appropriate Midi notes for the selected chord to loopMIDI which acts as a hardware midi device in Ableton.
I found that when holding the phone as you would a fretboard, the compass pitch value would range from 0 degrees when the phone is horizonal to 90 when the phone is vertical. So, I simplified this value to three ranges 0-30, 30-60, 60-90 and chose to assign major, minor, and seventh chords to these ranges respectively.
In the right hand I had a bit more trouble since there wasn’t really an appropriate sensor in the phone for this, and data is only sent every 100ms from oscHook (the experimental 50ms option crashed pretty consistently). I tried to use acceleration on the x-axis, so when there was a peak in acceleration downwards I would do a down-strum, and when there is an acceleration upwards there is an up-strum. There’s a few problems with this:
- Most of the acceleration begins at the beginning of a stroke, not while it is “passing over strings” so going by peak acceleration would cause a strum before you would normally hit the strings.
- Slowing down or deceleration at the end of a stroke is actually acceleration in the opposite direction of movement, so you generally get a peak in acceleration in the opposite direction of movement at the end of the strum, causing a “strum” trigger in the other direction
- There’s no way to avoid strumming, for example if you only want to do downstrokes or upstrokes.
The second iteration was to not use “peak” acceleration values to trigger a strum, but instead when the acceleration changes direction (acceleration values switch from positive to negative and vice versa). This occurs around the middle-end part of the strum when the user has stopped building up speed for their strum and has begun to slow down. This created much more accuracy but still didn’t solve the problem of not being able to avoid strumming entirely when you moved your hand. Here is an example of this implementation in action:
Finding the right sensor
I wasn’t happy with this strumming solution so I wanted to try a bunch of different sensors I have lying around to see if they could produce a more accurate reading.
For this I used a Teensy device (similar to Arduino) which I set up to behave as MIDI hardware device over USB. I then connected a few sensors to it.
First up is was what is commonly known as a “line tracing” sensor, but also functions as a proximity sensor.
Line Trace/Proximity Sensor
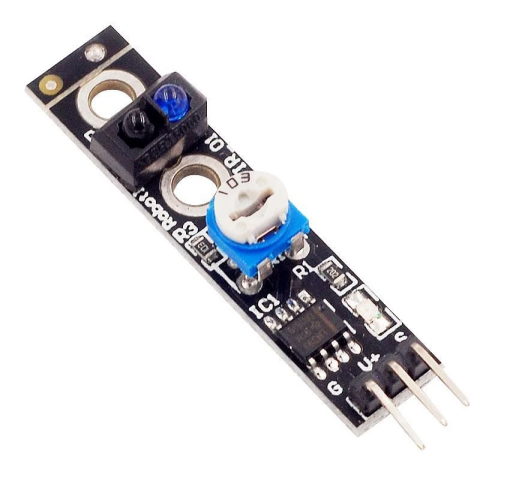
This functioned well in that it was very accurate, but the sensitivity of the device was too low. Your hand had to pass within about half a centimetre in order to trigger it so a lot of the time you either hit the device or it doesn’t get registered as a strum because your hand is too far away.
Magnetic Door Switch
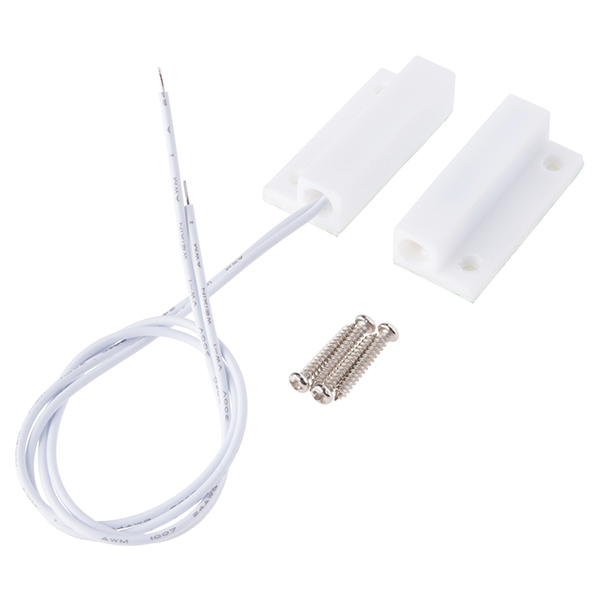
In testing this functioned the best. The distance was okay at up to 2cm and the switch was consistantly either on or off, unlike the hall effect sensor which had a mid-state and sometimes toggled between on and off when entering or exiting its sensitivity area.
Magnetic Hall Effect Sensor
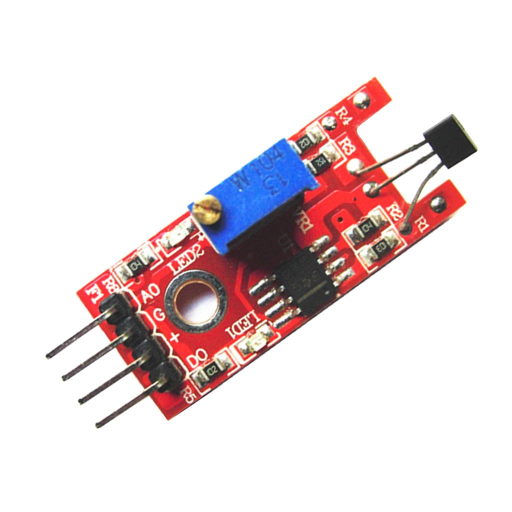
This device had the largest range but was also the least accurate because of that. It would retrigger multiple times for the same stroke (which was eliminated in code by implementing a “cooldown” timer after each stroke) but this particular sensor also has a “half-way” point where is constently toggles between the off and on states. This made for a cool “continuous strumming” effect after I implemented a 10ms cooldown on each stroke in my code, but it made the strumming overall less accurate.
A problem with all the sensors above is that they are only capable of detecting “strum” or “no strum”, there’s no possibility of detecting the direction of the strum. In testing I did put two Hall Effect sensors next to each other, and if the top sensor was triggered first it would be a down strum and if the bottom sensor was triggered first it was an up strum. Unfortunately, my two sensors had different levels of sensitivity so the results were not very consistent.
Joystick
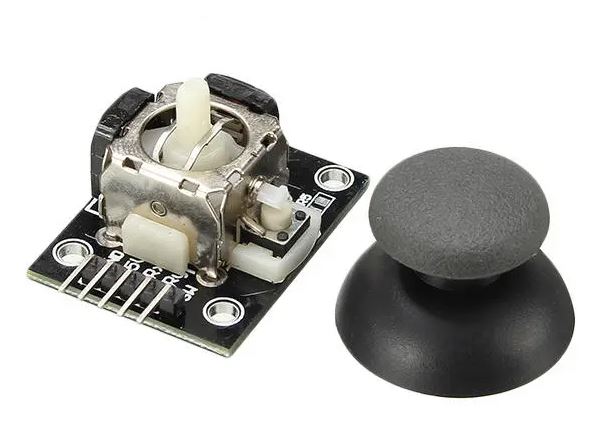
Finally, I felt like the main thing that was missing from this feeling of strumming was a level of tactility. Thinking back to my days of playing guitar hero on play station, I decided to replicate this strumming action using a joystick module. This enabled both up and down strums as well as the ability to either play only up or down strums. Since your thumb is always in contact with the joystick all proximity issues were eliminated, and the results are very accurate in comparison to the options tested.
The performance
What do you do when you have a guitar? You play Wonderwall, of course. For “Copyright Reasons” I’ve only included 4 bars in this final video, but it gives you an idea of the final product.
Final Thoughts
Overall, I feel like this was a successful project. Some adjustments I would make would be:
- Remove the tilting of the chord hand to modify the chord and just make the buttons customisable so you can set them up for each song.
- Currently, changing a chord immediately stops the previous chord playing (it sends an “all notes off” midi command). I would change this so that the chord is playing until the next strum is performed.
- Replace the phone in the chord hand with buttons. It’s hard to find the right chord without looking if there’s no tactile feedback.
- Make the “strum” note-on, note-off midi messages have a slight delay between them, as I think having no delay causes the VST play a single note sometimes instead of the full chord.
Ultimately, I would try to replace this implementation with a guitar hero controller as it has the layout of a guitar and has the chord buttons, tilt sensor and strumming bar all ready to go.
Code
The Arduino code for the Teensy Strumming can be found here:
https://github.com/leighmurray/teensy-strum-session
The python code for the OSC to Midi for chord changes and strumming can be found here: