Physical Computing: Heckathon: Group C
Paris (Paris.. Paris.. )
In a June 1, 2017 televised announcement, President Donald Trump announced the withdrawal, characterizing the agreement as a deal that “aimed to hobble, disadvantage and impoverish the US”. There are of course many angles one could exploit here! However, in consideration of the limited time we were allotted and the theme of “Recycling”, we decided to narrow Trump’s speech down to a single word, “Paris”, extracting that word from the audio and manipulating it in several ways. Thus, we hoped to recycle a small piece of what many would see as a very ugly and destructive speech and turn it into something beautiful.
Or, if not beautiful, at least we could defend it as a personal expression of political art.
How we done it
We combined a couple of approaches here, both low- and high-tech:
Iggy
Our man-on-the-ground in Trondheim, Tom Ignatius, came through with sound design, extracting the desired audio clip and twaddling it until it rendered all the elements of a lush electronica track. He used a series of effects such as pitch and time manipulation to extend the word 100X using a software called paulstretch. Further on, he manipulated the audio to create three different chords using a 100seconds reverb and a vocoder to extend out the chords.
For his side of things, He used the clips to make the percussions to the track using transient designer, multiband compressors, harmonic distortion and pitchshifters.
Original sample:
Percussion:
Pad:
Chordal stabs:
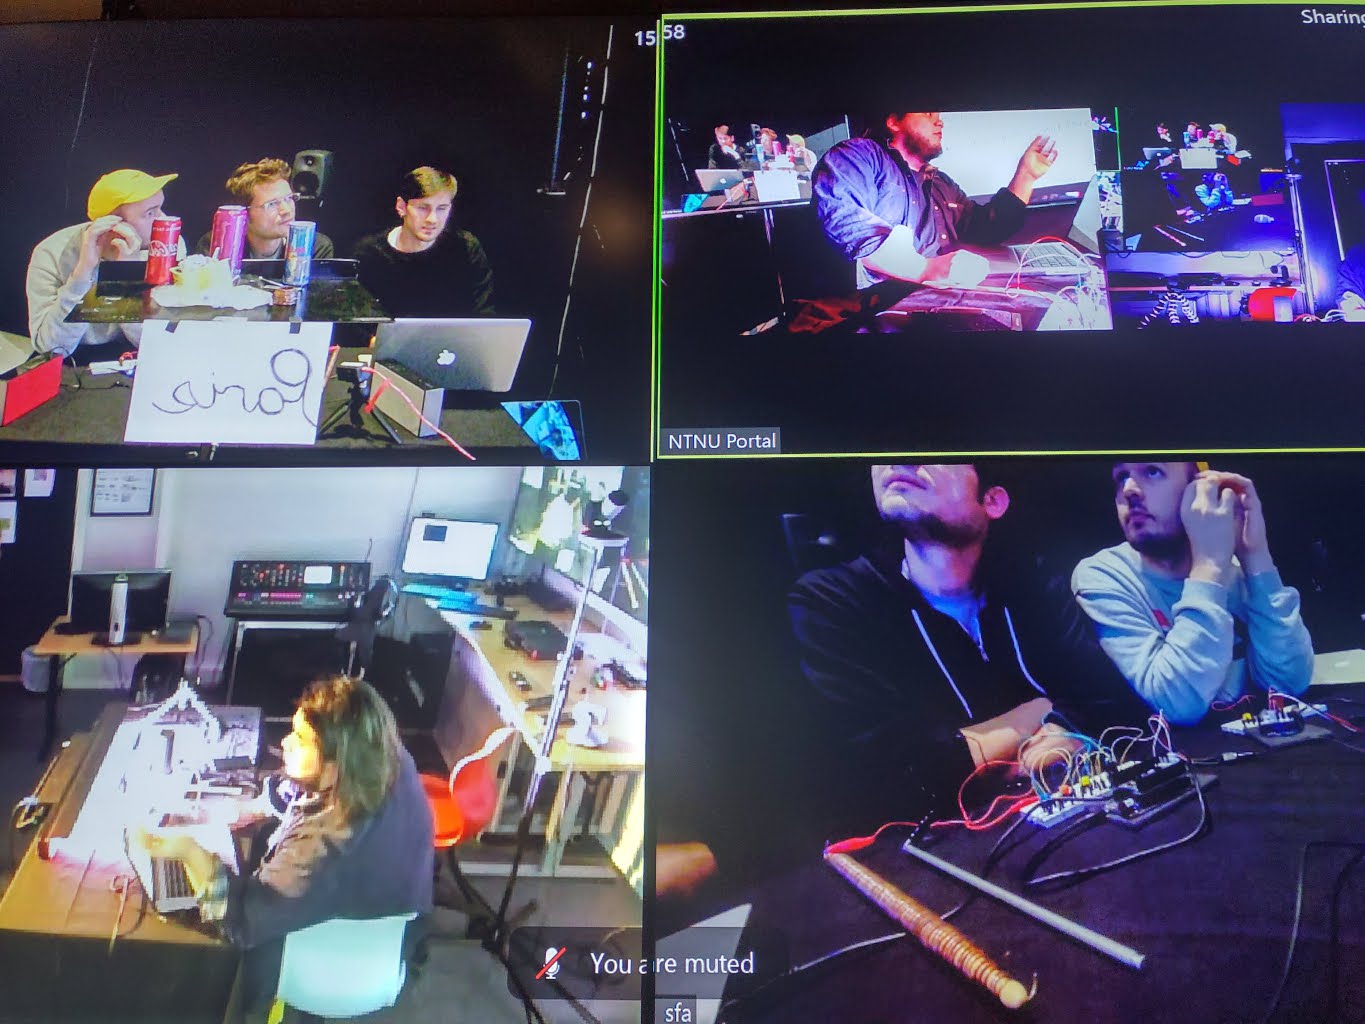
Meanwhile in Oslo, our favorite Norwegians Aleks and Thomas set to work on the Pure Data architecture. Working diligently in convivial Nordic silence, they completed their tasks with nary a hitch, the perfect stillness of the room only occasionally broken by the triumphant bleating of electronics, indicating that, yes, everything was working perfectly.
Aleks
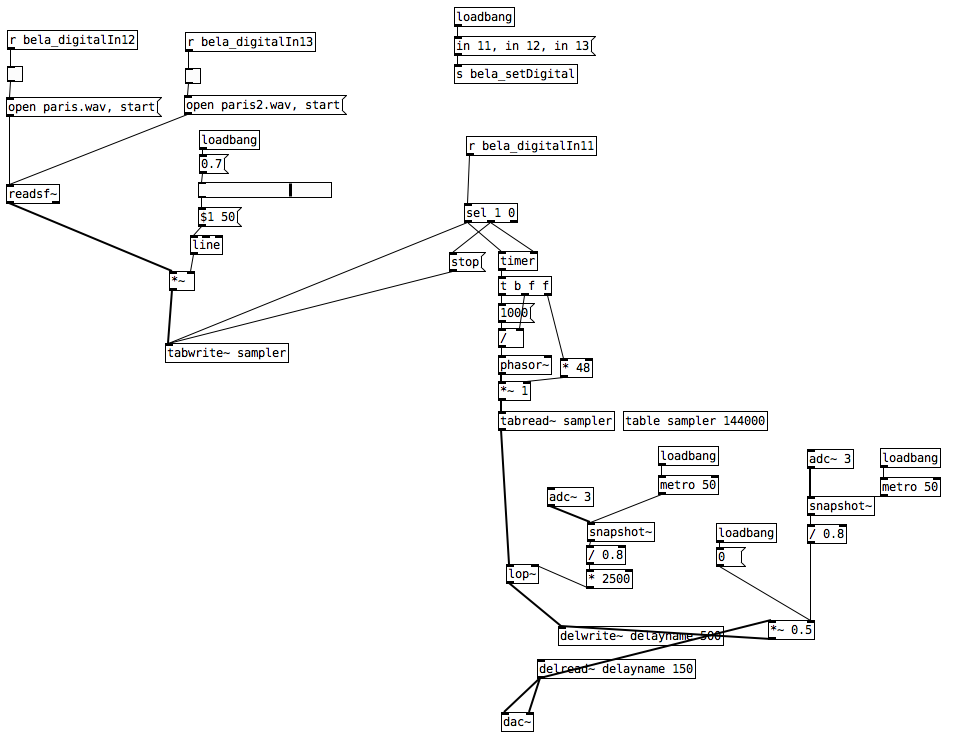
After the topic was decided I quickly began to search my PD-pathces for inspiration. Shortly after I began to further developing a looping and sampling patch I made day two in the workshop.
The instrument design consisted of three buttons, one rotary knob and two audio samples. The first button enabled the recording and determined the length of the loop. The other two buttons triggered audio samples which fed into the sampler. The audio consisted of two separate segments of the word “Paris”, streched and slightly pitched by my man Iggy.
The rotary knob controlled both a low-pass filter and a delay. However, the low-pass filters sole function turned out to be volume control. Rotary value 0 = 0 hz cutoff and no delay Rotary value 1 = 3000 hz cutoff and full delay.
After manically trying to solve Pauls copper drumstick and metal rod riddles (more on this later in the post), we stumbled upon an effect which actually produced results. When Paul replaced the rotary knob on my board with connections to the copper and metal rods (voltage and lead) we discovered that touching the rods together boosted the input values while removing them from one another deceased the values. This effect can be seen and heard in the video below.
Furthermore, choosing a very short amplitude envelope resulted in some clipping when triggering the audio samples, an effect which was used musically in the performance and generated a new iterated dimension to an otherwise “flowey” sound texture.
Thomas
My PD-patch was quite minimalistic. With the help of the PD-guru, Aleksander, Iggy’s manipulated samples were triggered by the push of a button. To keep it simplistic and within the recycling-spirit I “chose” to only have one button trigger the four samples. The samples were assigned to four different digital outlets and I changed between them by plugging and unplugging the cord from my button.
I also had a little delay in the patch, and manipulated the mix of the delay with a potentiometer knob.
I spent most of my time being frustrated that I couldn’t get anything to work, and I ideally wanted to use more knobs and buttons, but my equipment was not cooperating.
Paul
Being the only ‘merican in the group, I (Paul) decided to go low-tech cowboy and attempt to recycle some garbage into variable resistors that would interface with the Bela and replace some of the switches and knobby-things on the breadboard.
I started the day walking around outside picking up trash. There wasn’t much! Kudos to Norwegians for being adults and placing their søppel in the appropriate søppelbøten. I ended up scouring the break room bins for usable items, coming up with three soda cans, some candy wrappers, and a bit of foil. One thing I did find outside, though, was a small roll of corroded wire. Yee-ha! I reckoned I could turn that into a dandy variable resistor.
I was wrong, or at least, only partly right (being generous here).
After some testing, I determined that all my trash was either non-conductive, or too-conductive to make a proper resistor. Even those candy wrappers that look semi-metallic . . . aren’t.
To make a homemade variable resistor one needs a conductor (a wire, rod, etc) that is only minimally conductive along its length. Connecting an ohm meter probe to one end and then touching along its length with the other probe, a feller can see that the resistance goes up the farther out from the first probe one goes. Used in a circuit, the second probe is the “wiper” and can be run along the wire to change the resistance in the same way a potentiometer does, controlling parameters such as volume, effect level, modulation, etc.
Nichrome wire of the sort used to make heater elements would have been ideal, but surprisingly, I didn’t find any of that lying about. So, I decided to try making a wire-wound resistor out of the bit of found wire, wrapped around a drum stick I “recycled” from the MCT portal.
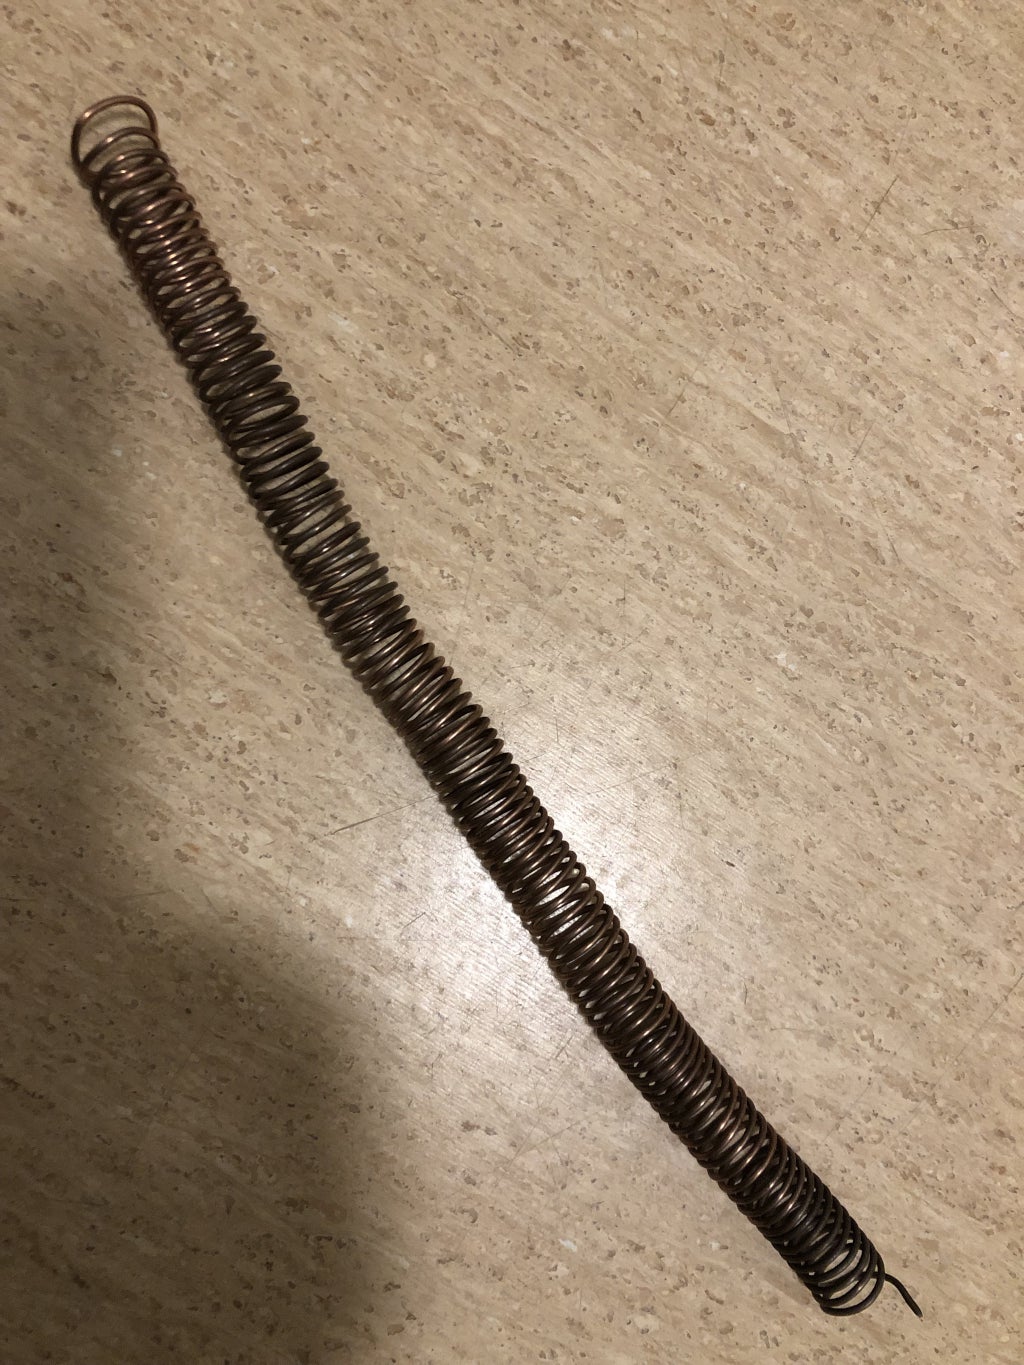
Turns out, the resistance in this wire was only minimal along its length. After the corrosion was partly rubbed off, it was revealed to be what looks like 14 gauge copper wire; an excellent conductor of the type used to wire houses. Basically, I would need a couple miles of this wire wrapped a very large insulator to get the results I wanted. But, it looked cool and we were able to make some unexpected noises with it (see performance).
In the end, the day was mostly about failure for me. I say this not as a negative thing, as I have several new ideas for instruments that could be made using what I’ve learned through miserable, abject humiliation and defeat. The technologies I’ve been introduced to through this course are very exciting, and the potential is great. I hope to learn more and return, triumphant. Stand by . . .
The Performance
Despite the various hitches in our giddyup over the course of the day, the performance went well. We were able to trigger Iggy’s sound files and make music. The rhythmic loop that Iggy made gave us something to nod our heads to, and the triggered pads and stabs sounded great. The variable resistor plugged into the Bela made some racket but not the originally intended racket.
Conclusion
This was quite a week, with many challenges. Day 4 was probably the most stressful, and all of us were wishing for a little more time to work things out before the performance. Overall, though, we felt like our concept was very good. With a little more time to work out the kinks it could be turned into a cohesive artistic statement that we could all be proud of.
Viva Paris!